Search criteriasThe looks and the brainsLet's try itBeware!Opening the caseThe actual issueAdditional pictures
The problem with vintage equipment is that it has a limited shelf life, and some specific parts are now either difficult or impossible to find.For my Oric activities, I've been using a 36cm Sony Trinitron found in the storage area of Funcom when we moved to a new office, and it's been faithfully working for years... but recently it has started making some humming noise and sometimes have a faded picture, which is generally not a good sign.
Additionally, for all it's qualities, it is not what I would call a pretty TV, and now that's I'm doing regular Youtube videos this TV is being a bit of an eyesore.
Fortunately I found a replacement!
Search criterias
The first CRT (cathode-ray tube) televisions appeared in the early 1920, and progressively improved in quality until the end, around the year 2010.The earlier models were black and white, with very limited resolution, but at its peak the technology easily rivaled in quality the best LCD screens on the market. They mostly succumbed because of the weight, size and high production cost.
What that mean, is that whatever CRT model we find, will be at least 10 years old... which is not actually that bad.
Toward the end, the CRT TVs had support for many different type of inputs (including SCART), supported stereo sound, remote control, had programmable presets for display parameters, on screen display, input scaling and zooming, etc... older tvs would often only have support for aerial connection.
I started my quest by doing a list of cool looking, retro-looking tvs, ideally in colors that would match nicely with my Oric.
I found plenty, and just for the "black and red" category you can see the following candidates:
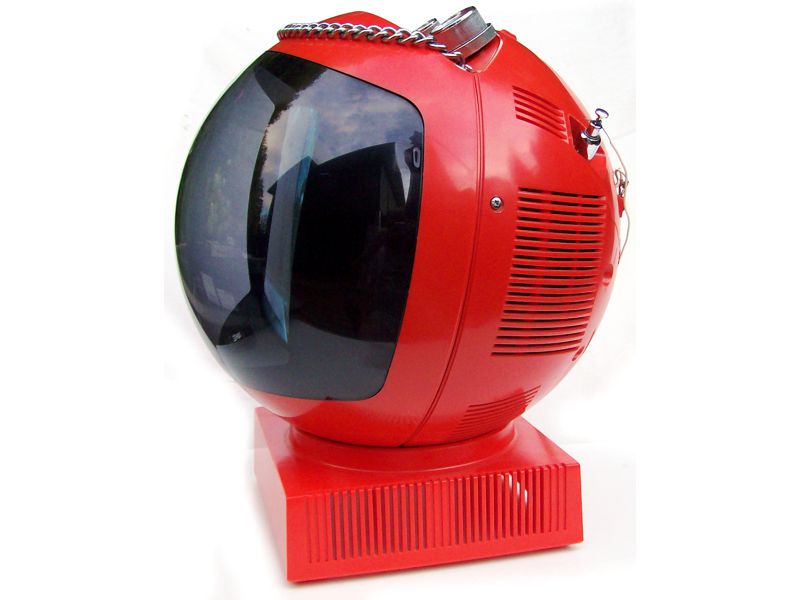
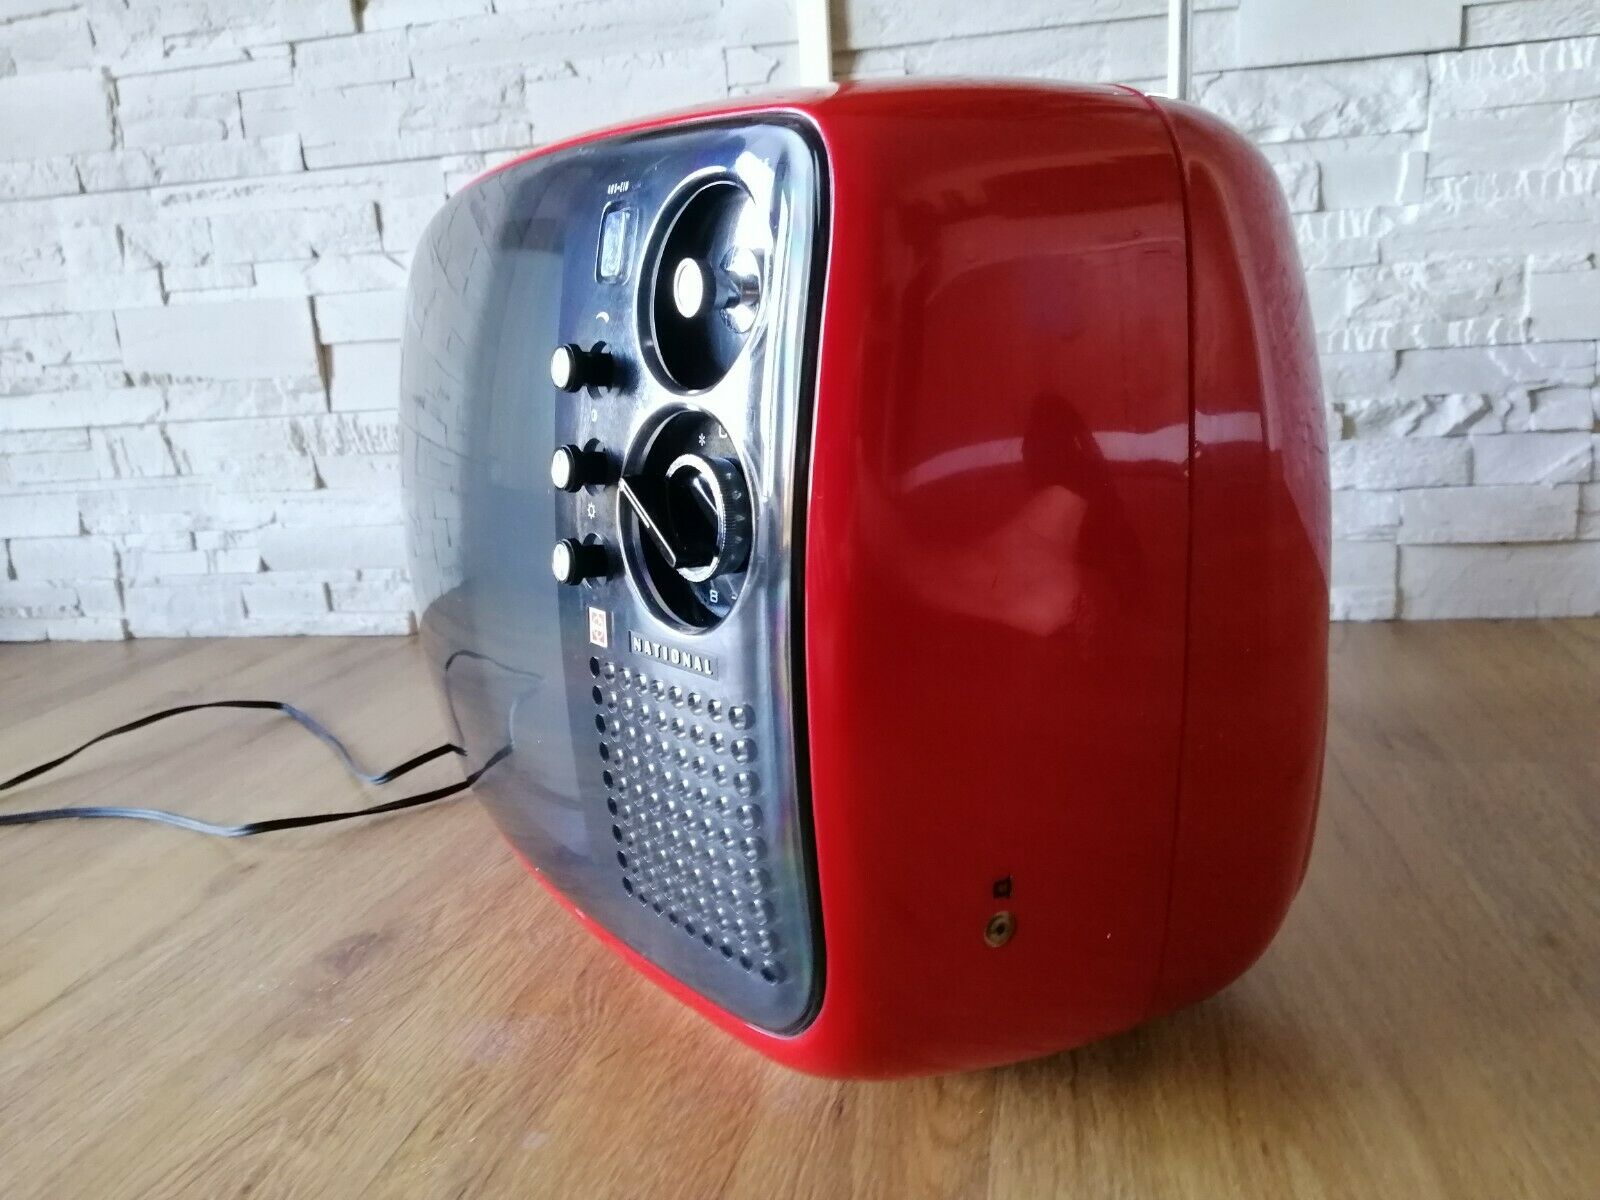


As you can see, the more the time passes the more these TV gets boring looking, and things did not improve much in the 1990ies...
Last year I actually did buy a Philips Discoverer, in pristine condition, with all the parts, non scatched helmet, etc... from an Italian seller on eBay, but when he tried to send it the post office refused:
They did not want to take the risk to send a CRT!
So the guy refunded me, and I had to keep searching, knowing that I would probably have to limit myself to the Oslo area, or at least to places I could physically land-travel to.
The looks and the brains
Which is how I found the Brionvega Algol BV1, it was just there, waiting for me on Finn.no.If you have never heard of Brionvega, here is what the Algol TV looks like:
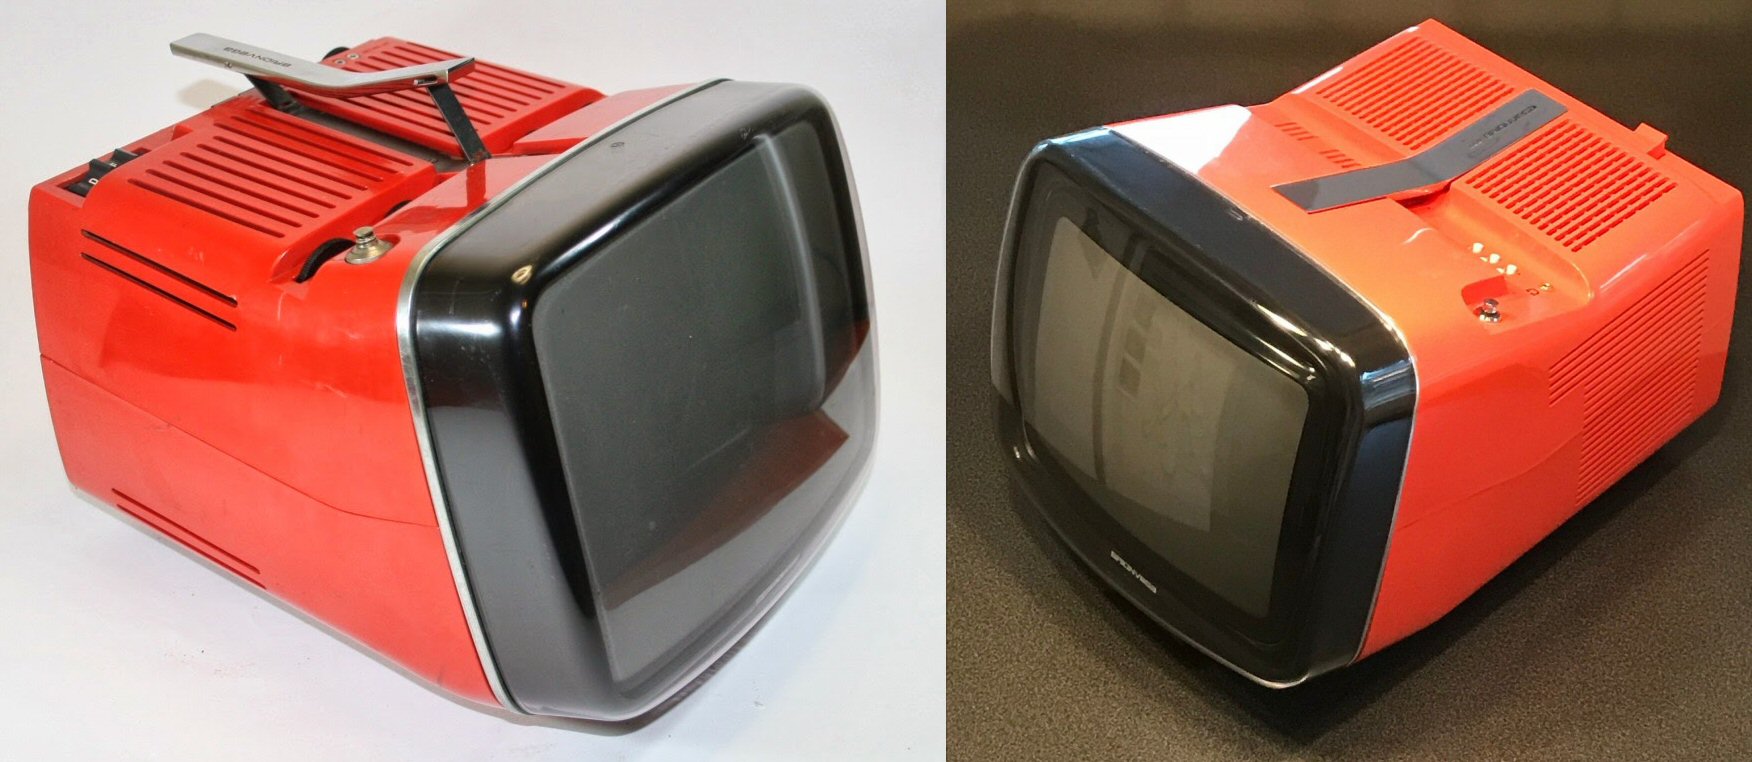
On the left is the original model, released in 1964, considered a classic of italian design and one model is actually exposed1 at the NewYork Museum of Modern Art (MoMA).
There are plenty of designer websites with dedicated pages about it, such as that one on Italian Ways from which these two quotes by Piedmontese designer Enzo Mari come from:
“Designer and architect Marco Zanuso, with Richard Sapper who joined the studio in 1957, fine-tuned two television sets that I consider without a doubt the prototypes of any following model. In 1964, ten years after TV broadcasting started in Italy, he put his name on the Algol for Brionvega. (...) In a time when all devices were hidden within kitsch wooden units so they could fit in with the old-style furniture they were meant to live with, Zanuso designed his television like an industrial tool, a machine, putting all of its inner workings on display. The inclined and rounded screen was determined by the main component, which had been concealed until then: the cathode ray tube”
The sad thing, is that like many Italian companies, they eventually vanished, the brand was bought and resold multiple time.
What's interesting, is that this model did not just vanish, it was actually updated multiple time, keeping the quintessential shape and design features (the angled screen, the transport handle, the two tones casing) while upgrading to more and more modern technology inside, up to this 2002 model.
If you are wealthy, you can even buy a brand new, limited edition "military green" model at Super Fluo (which apparently is the current owner of the brand).
Only 1170 euros.
So anyway, this 2002 model met all the criterias:
- CRT technology
- Not too old (color and SCART support)
- With good image quality
- Matching my Oric Atmos computer
I asked confirmation that the TV was in working condition, the seller sent me some new photos showing that it was, and he actually delivered the TV in my hands the next days since he had some business meeting.
Let's try it
Since the TV had travelled in a cold car for a while, I let it warm up to the ambient temperature, and a few hours later I switched it on.Or more exactly, I tried:
No matter what I did, the TV stayed on StanBy.
I tried to see if there was maybe a problem with the power cable... and tada, the picture appeared... and as soon as I stopped touching it the picture disappeared and it was back to standby mode.
I made a video and sent the link to the seller to ask if he had a suggestion.
He suggested to try some other cables, that the tv was working fine when he tried it, and eventually said we could cancel the sell if I wanted, under condition I would not open it.
I decided to ask wise people on the internet, and posted a message on the UK Vintage Radio Repair and Restoration forum.
After seing the video, there was a strong oppinion that the issue was definitely solvable, and most probably easy to find... and they have at least one active member in the Oslo area which could help if needed, so I decided it was probably worth taking a gamble and see what was wrong with the TV.
Beware!
If you are not comfortable with tinkering with devices, and if you are not aware of the potentially deadly risks of playing with big capacitors and vacuum tubes, then that's probably not for you: Ask someone who's competent, and in my case I was working with someone who actually has a certification in TV repairs.The main reason why I'm writing this blog post is that it appears that there is no publicly available documentation for this model of TV, the 1964 model is fully documented, but nobody actually has photos, services manuals or blueprints for the 2002 revision, so there will be a bunch of photos, it's because it's potentially helpful for other people.
Opening the case
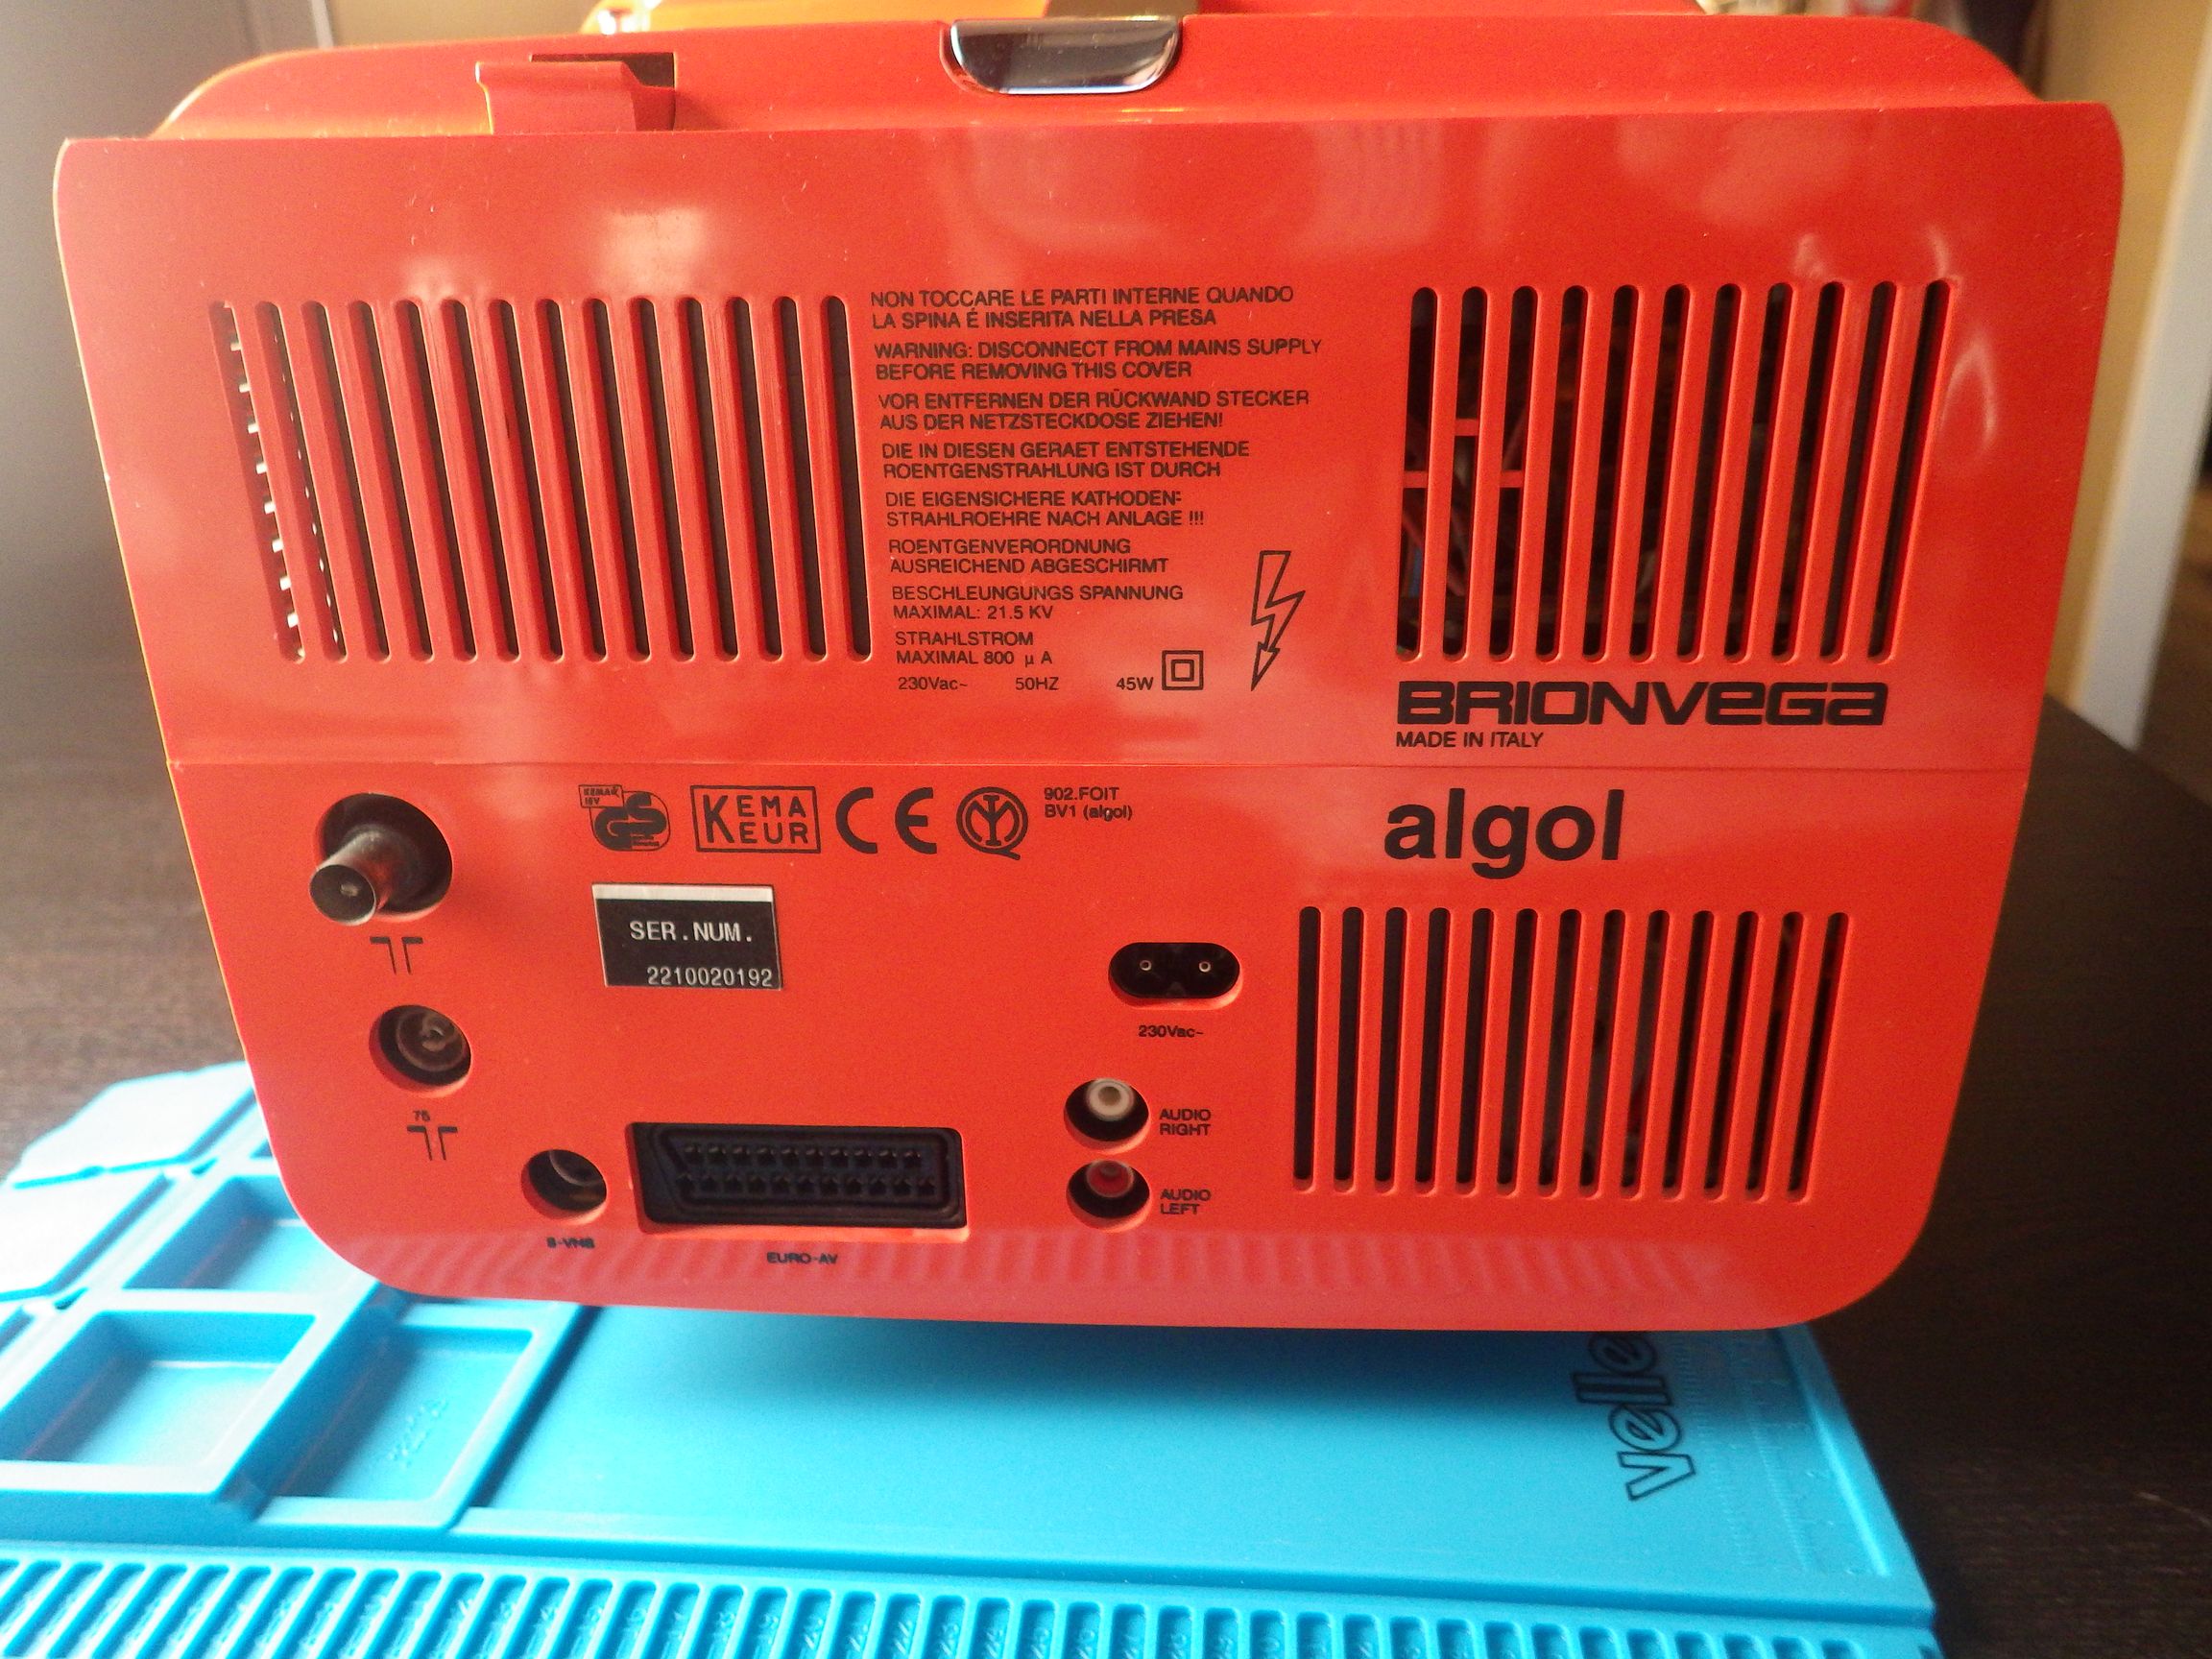
This TV is actually very easy to service, but let start by some general outside photos:

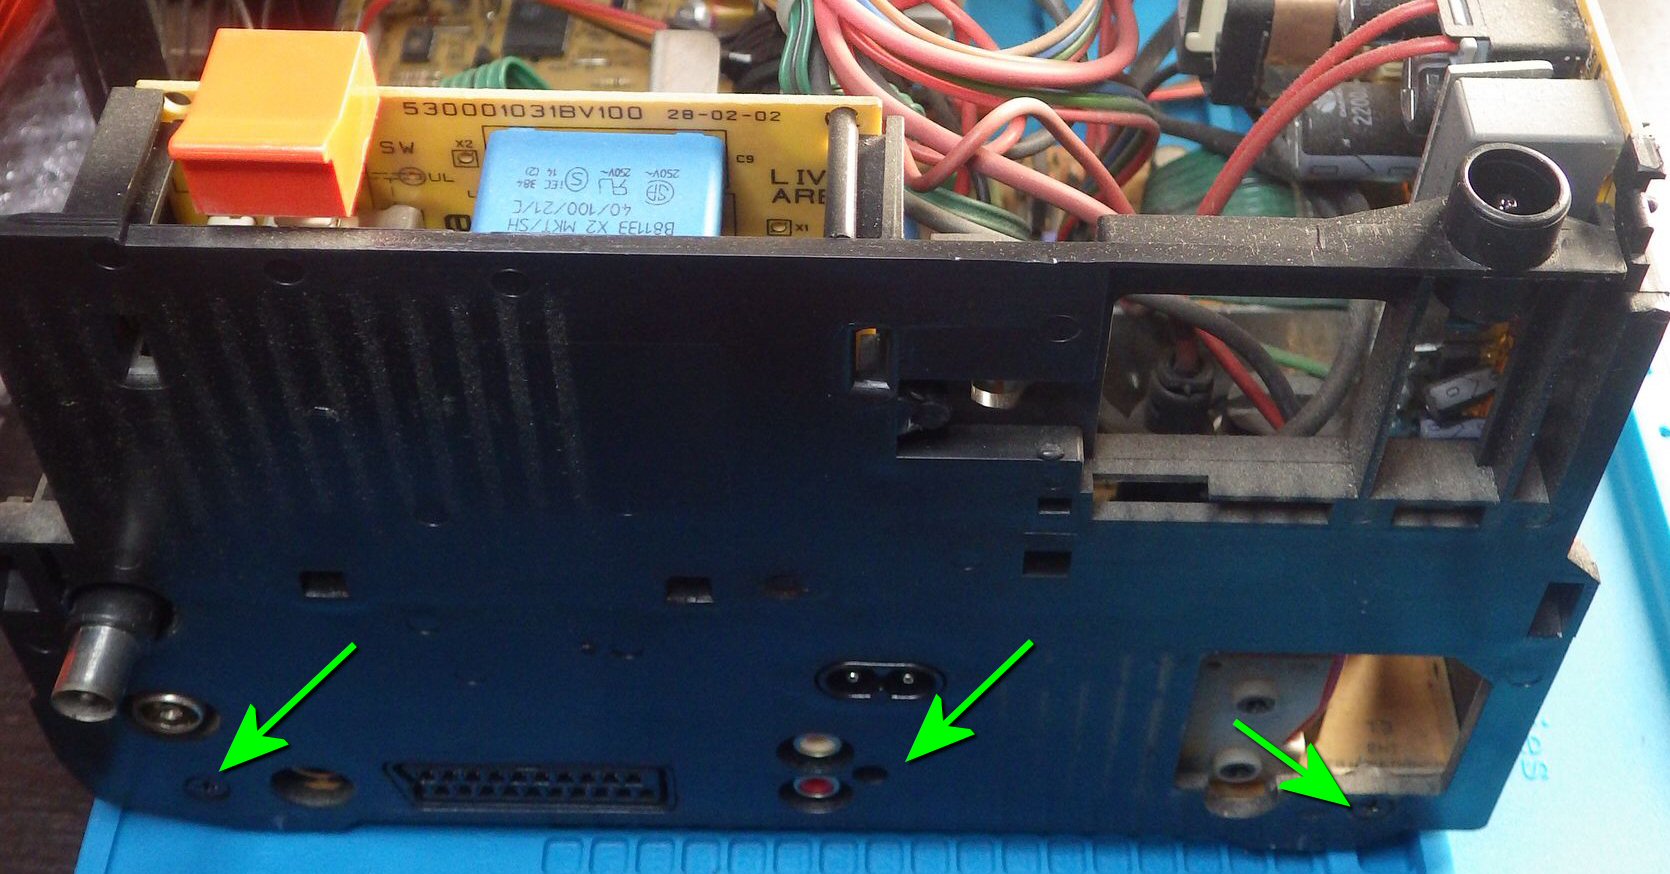
With these four screws removed you can open the bottom part, but be careful because the IR/Standby led circuit is attached to it.
You can easily remove it by unclipping the semi transparent cover (see the two circles on the previous picture)


With the bottom part of the case removed we can also access to the four screws (two on each side) that maintain the top part of the case attached:

And before forcing to open it, remember to remove the last screw hidden at the front under the handle.

We can now see the entire structure:

Before continuing, I suggest removing the speaker and the control button, because that would allow removing the entire top case:


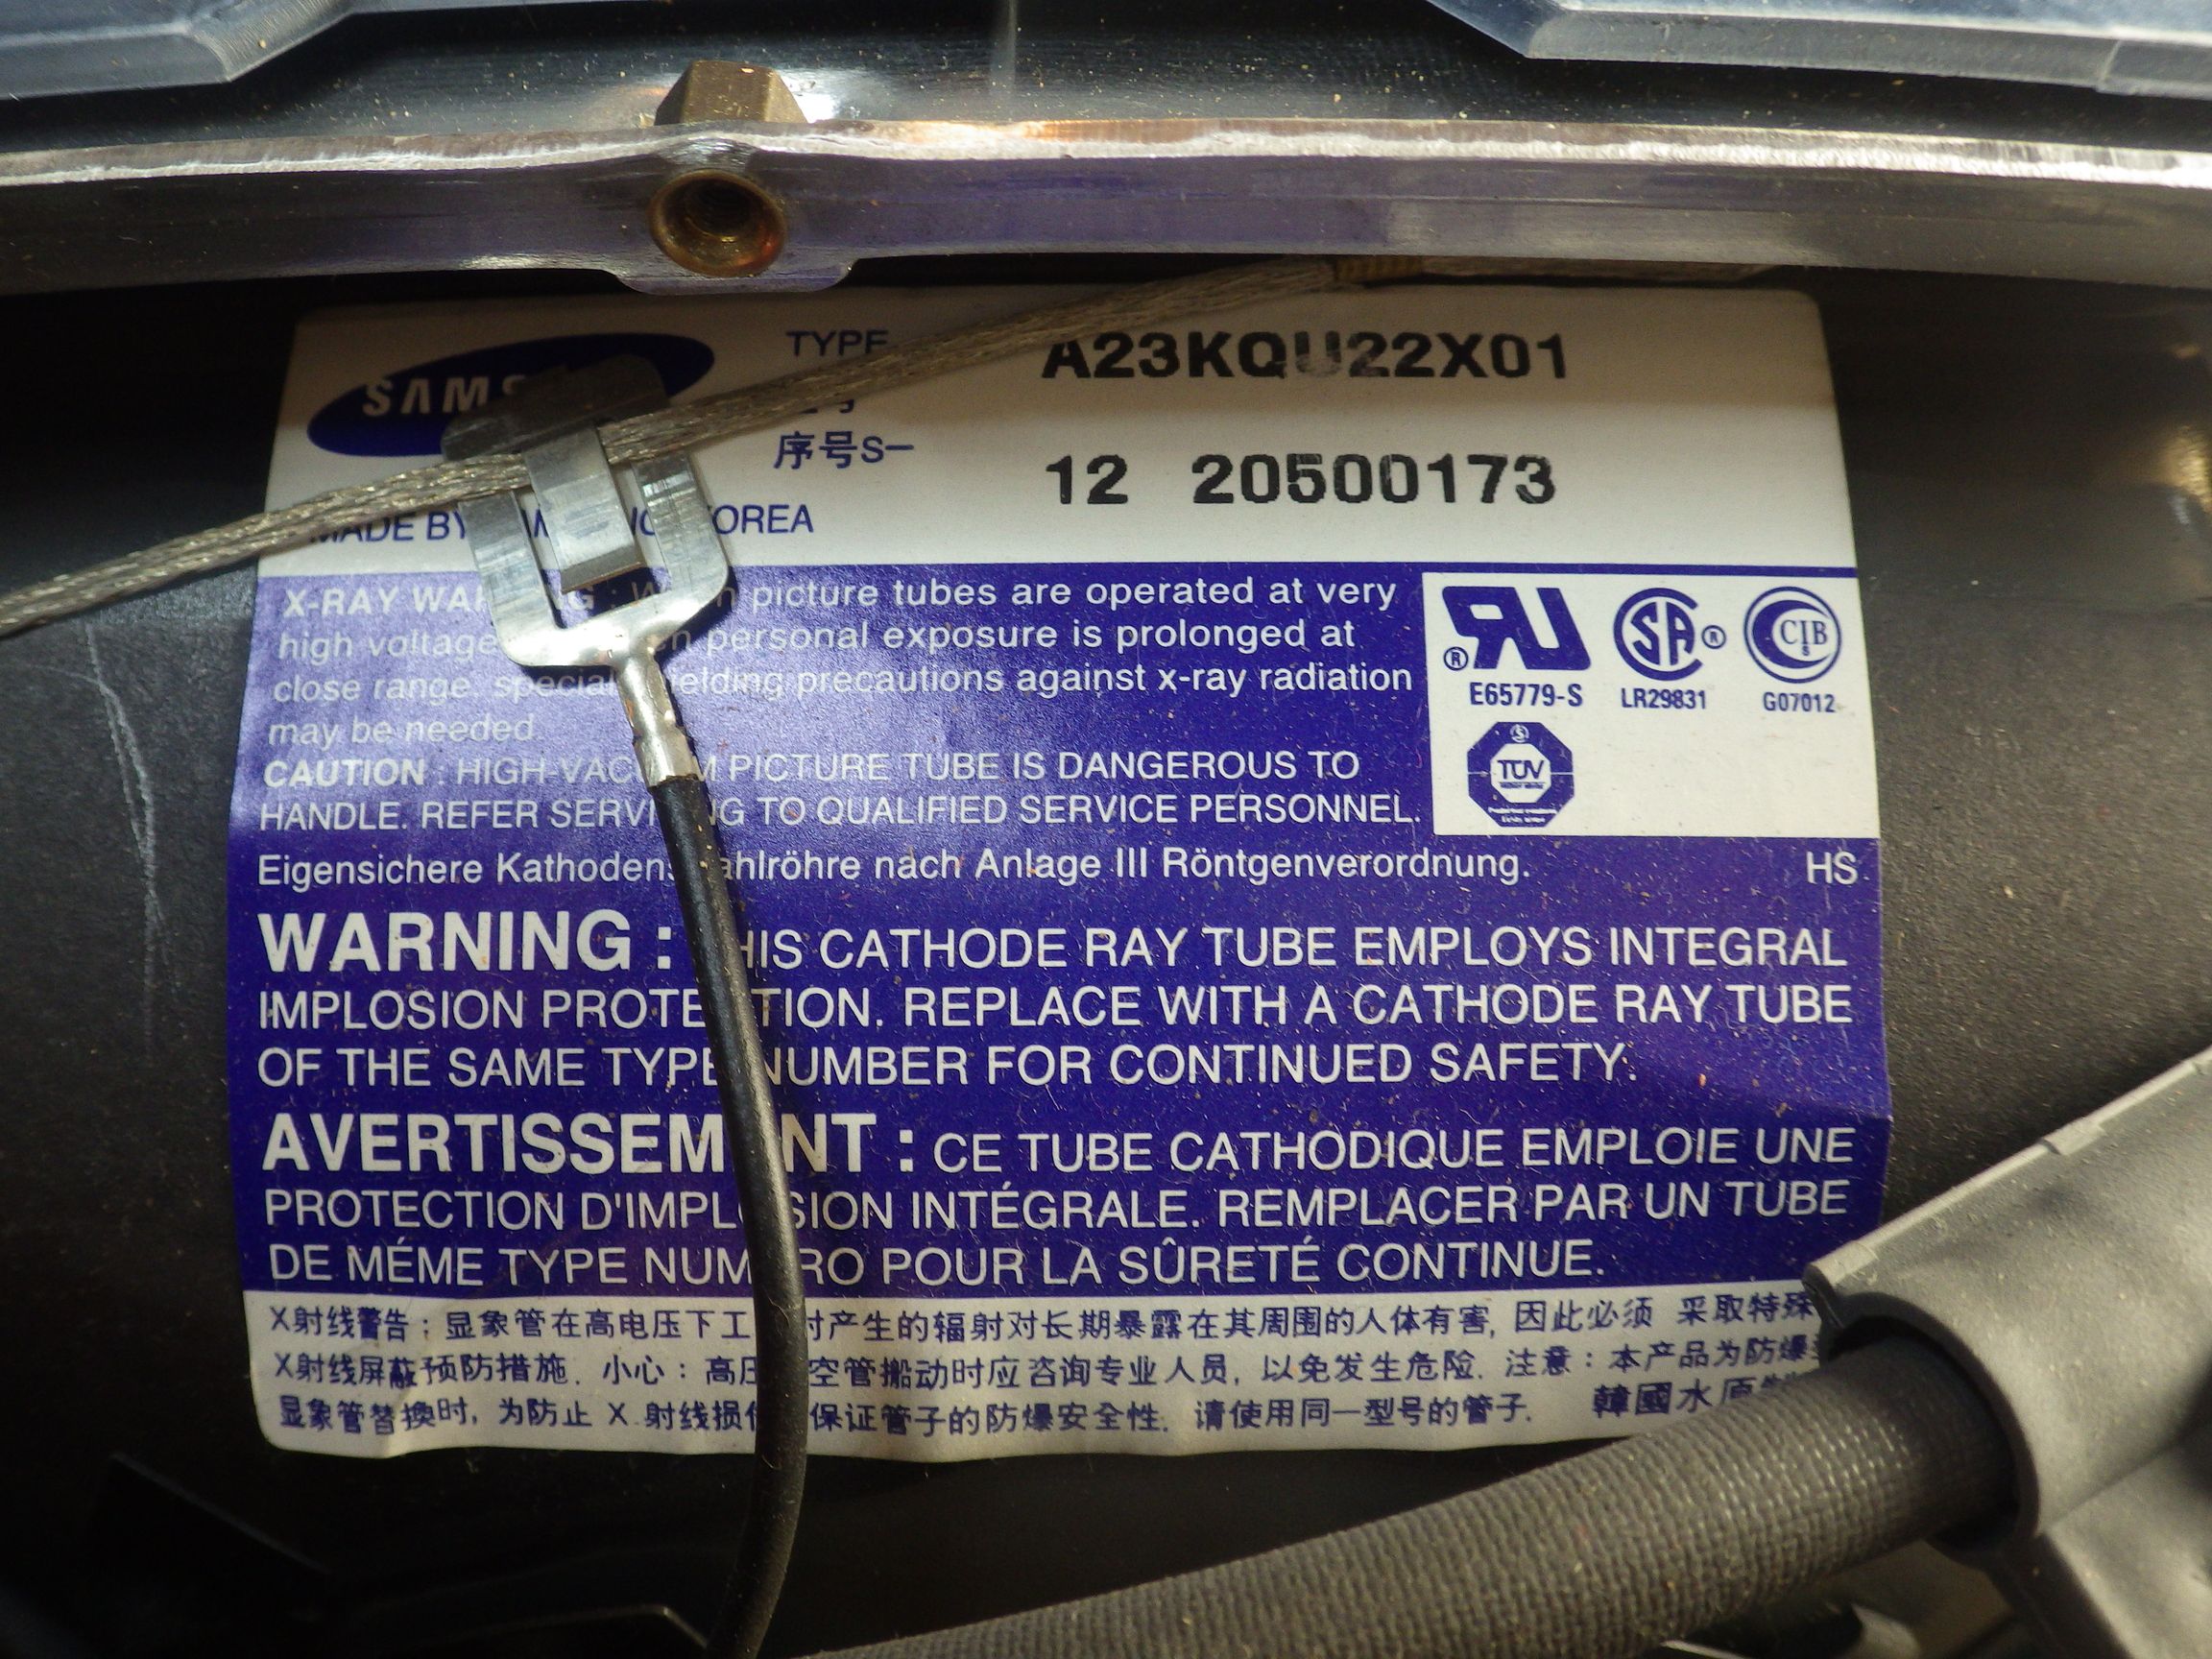
Since some of you wanted all the references, here is a close up of the Samsung CRT Tube used on the screen
If you wish to separate the tube from the main board, you will have to remove a few more screws, including these three at the bottom of the back plate. Please note that the one in the center is not the same length as the two others:
In order to remove the board that hosts the ON/OFF switch and the fuse (3.15A, 250V), you need to push out two plastic clips:

which give access to the board.
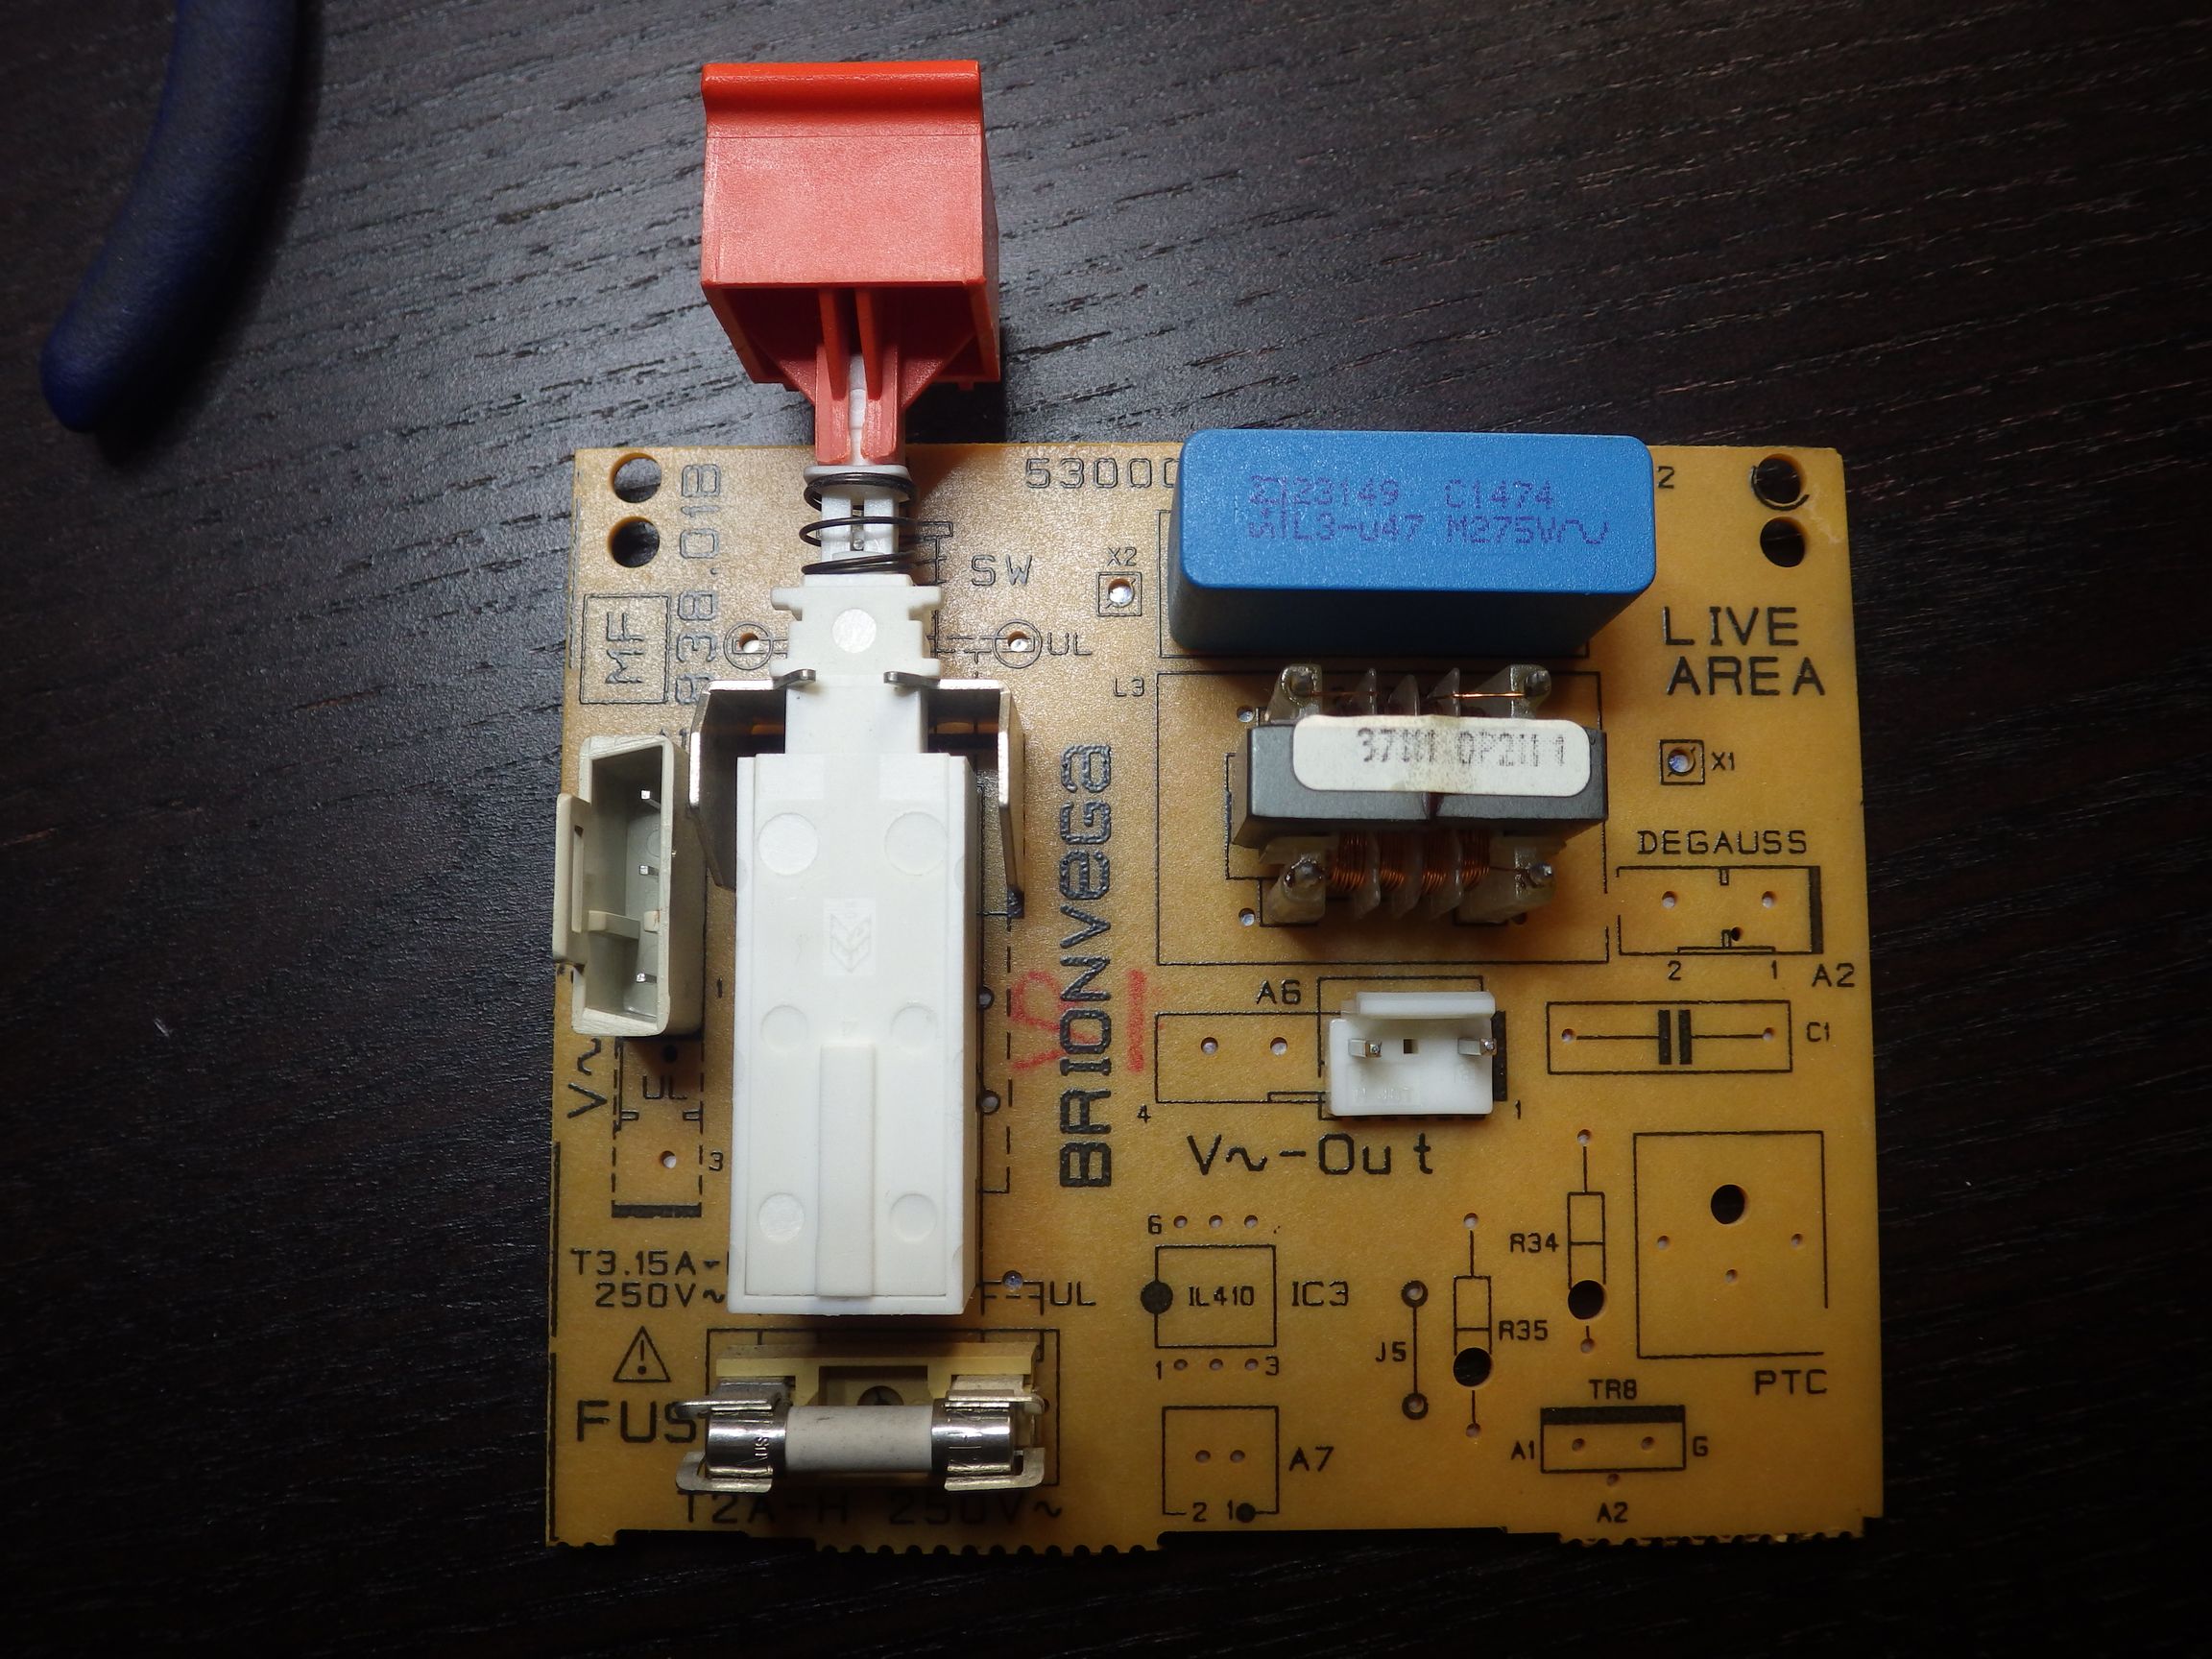

The large connector on the right connects to the two pin 220 volt connector on the main the TV, while the small connector in the center of the board connects to the actual power transformer board (the one on the right side of the TV).

Note that there are some missing components, for example the DEGAUSS part which is present, but on the other board.
Removing the power board is not much more difficult, you just need to push a clip on one side, and slide out from the ridge in the other side:

Before you unplug that one, write down where all the connection go, because this card is the one that connects to the most other parts

If you managed to get lost, I added markers on the next picture indicating what connects to what:

- A, Connects to the center connector of the switch board
- C, Is the small red and black cable that goes up to the mono speaker
- F, Connects to the green flat cable that joins the main board
- D, connects to the degausser (the big gray cable on the tube with the two red pins)
- R, Connects on the main board just under the front of the screen, on the right side
- G, Connects on the main board between two blue capacitors next to the Philips chip on the left side, written Volume
- B, Connects on the main board at the back just under the switch board

Did I say SPEAKER?
Yes, for some reasons the designers thought it was a good idea to have the amplifier for the internal speaker to be installed as close as possible to the power transformer.

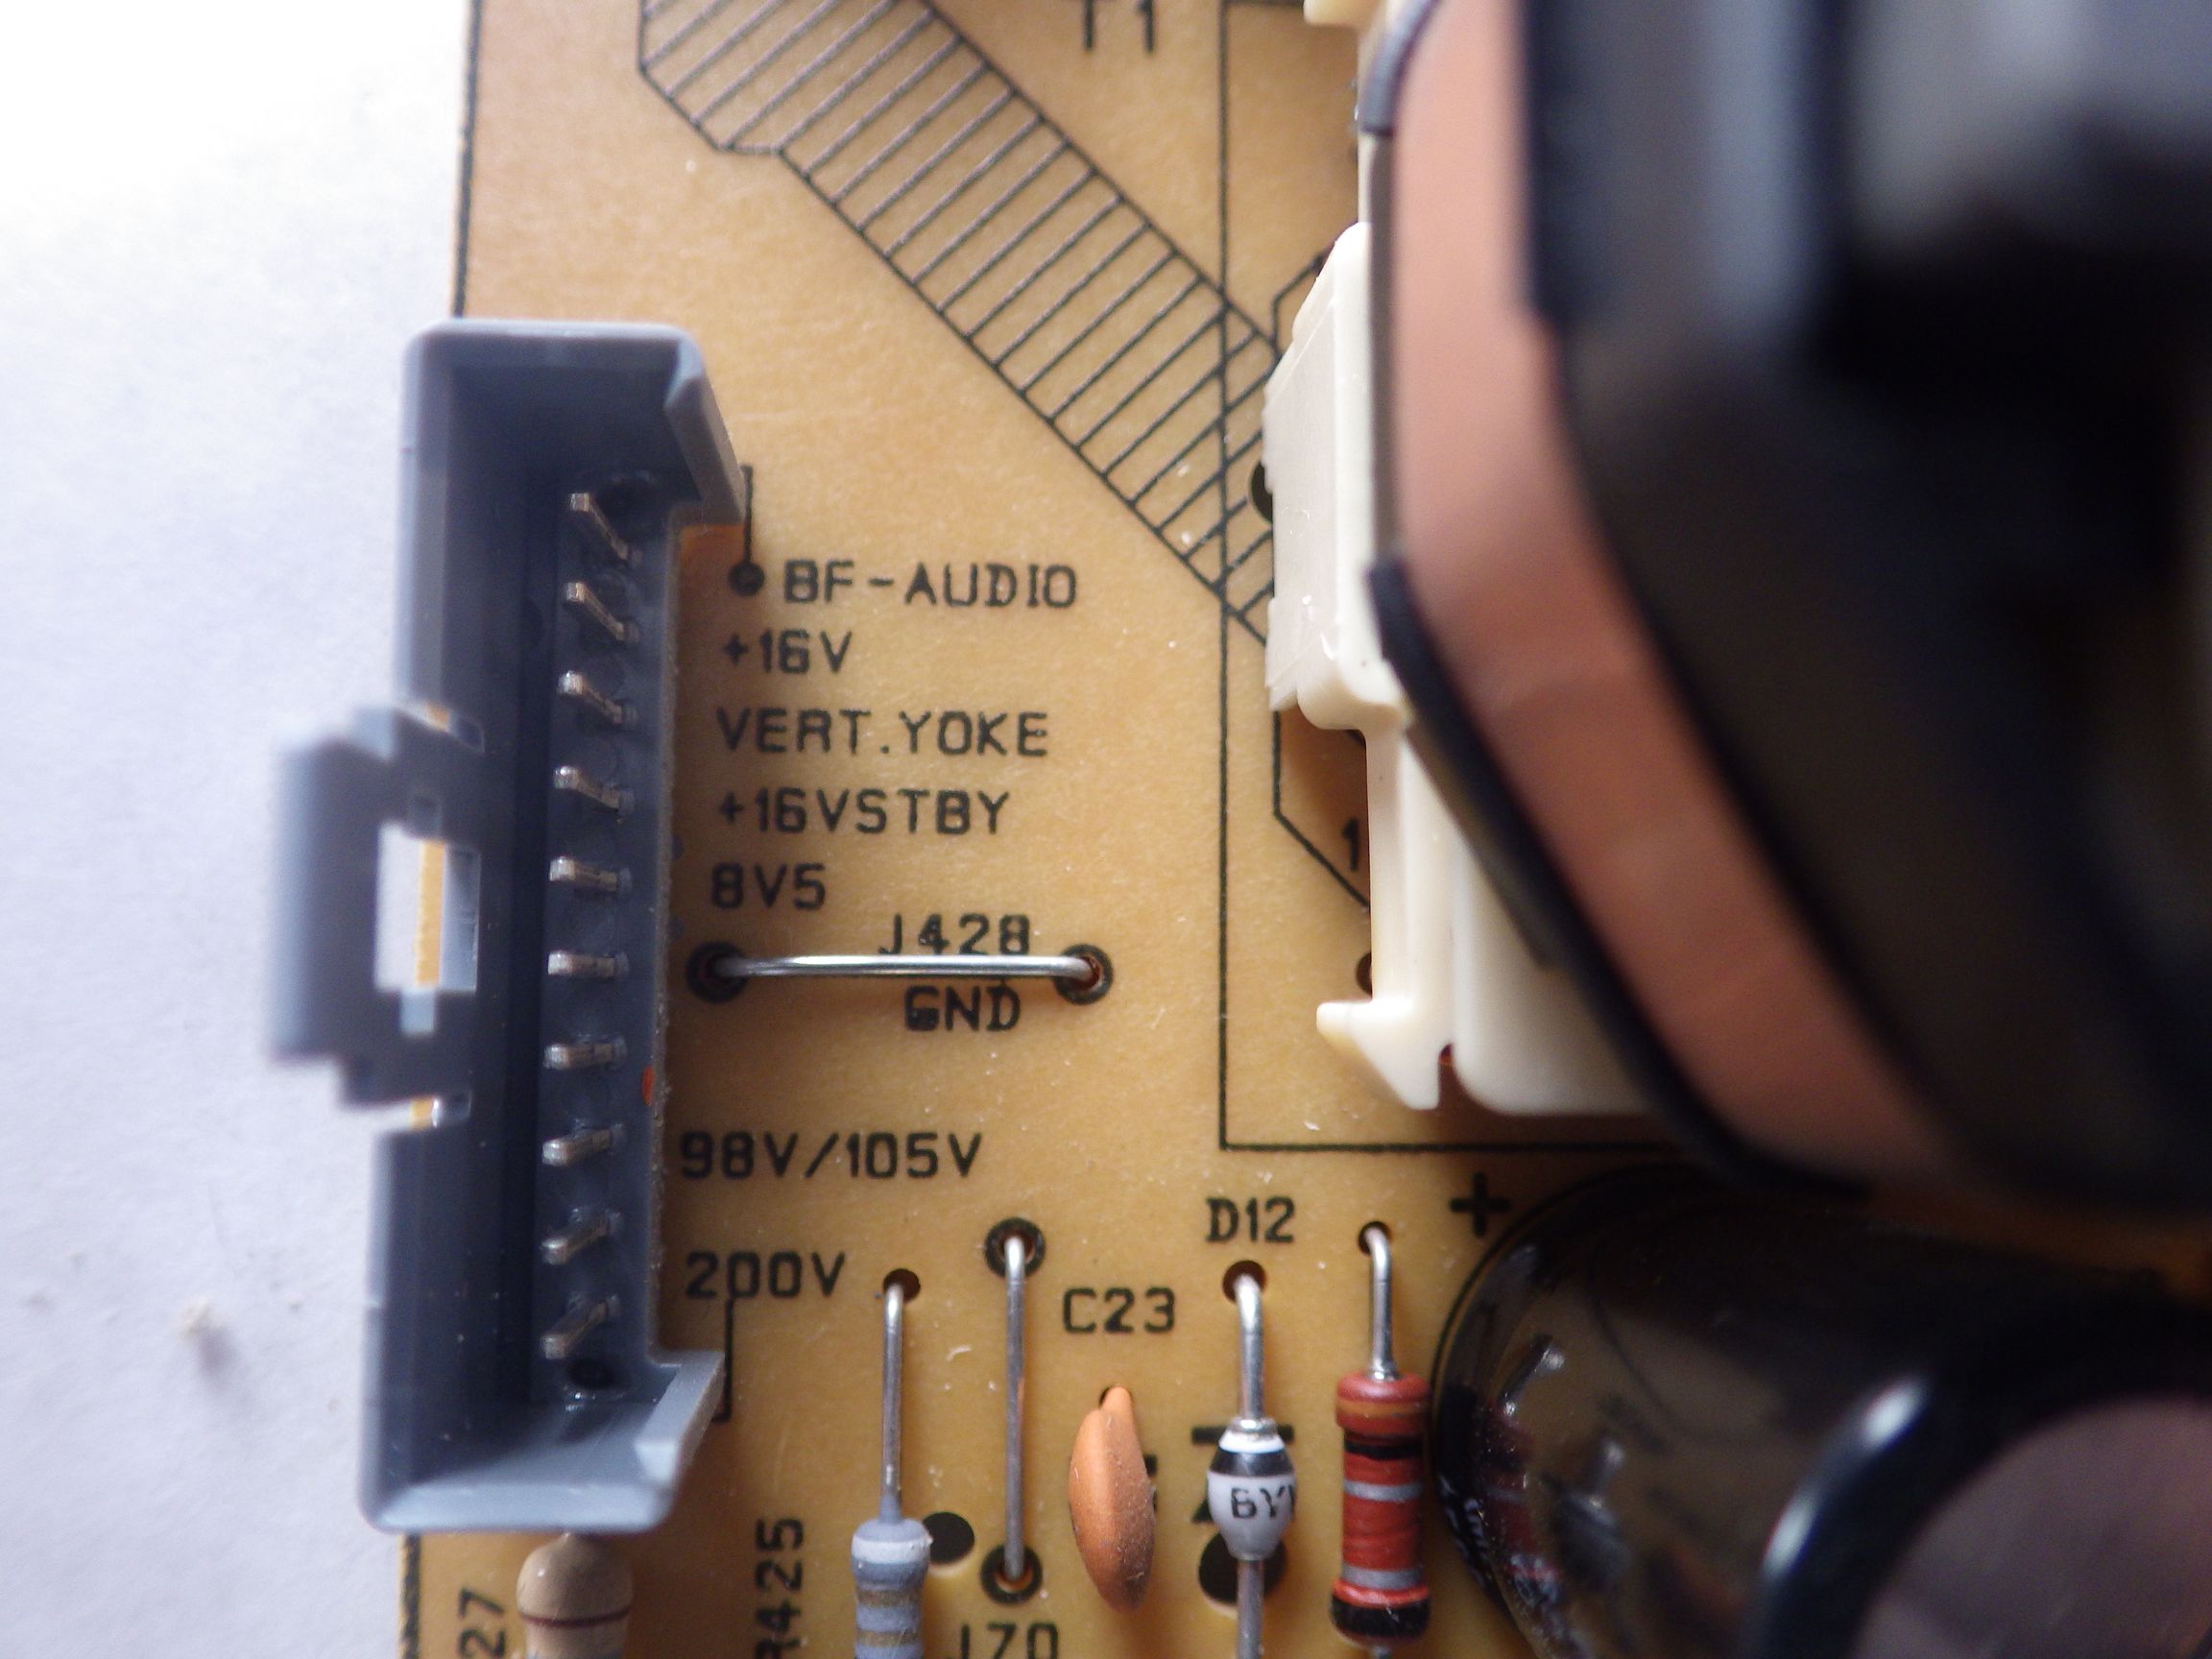
Let see some other parts of the board:
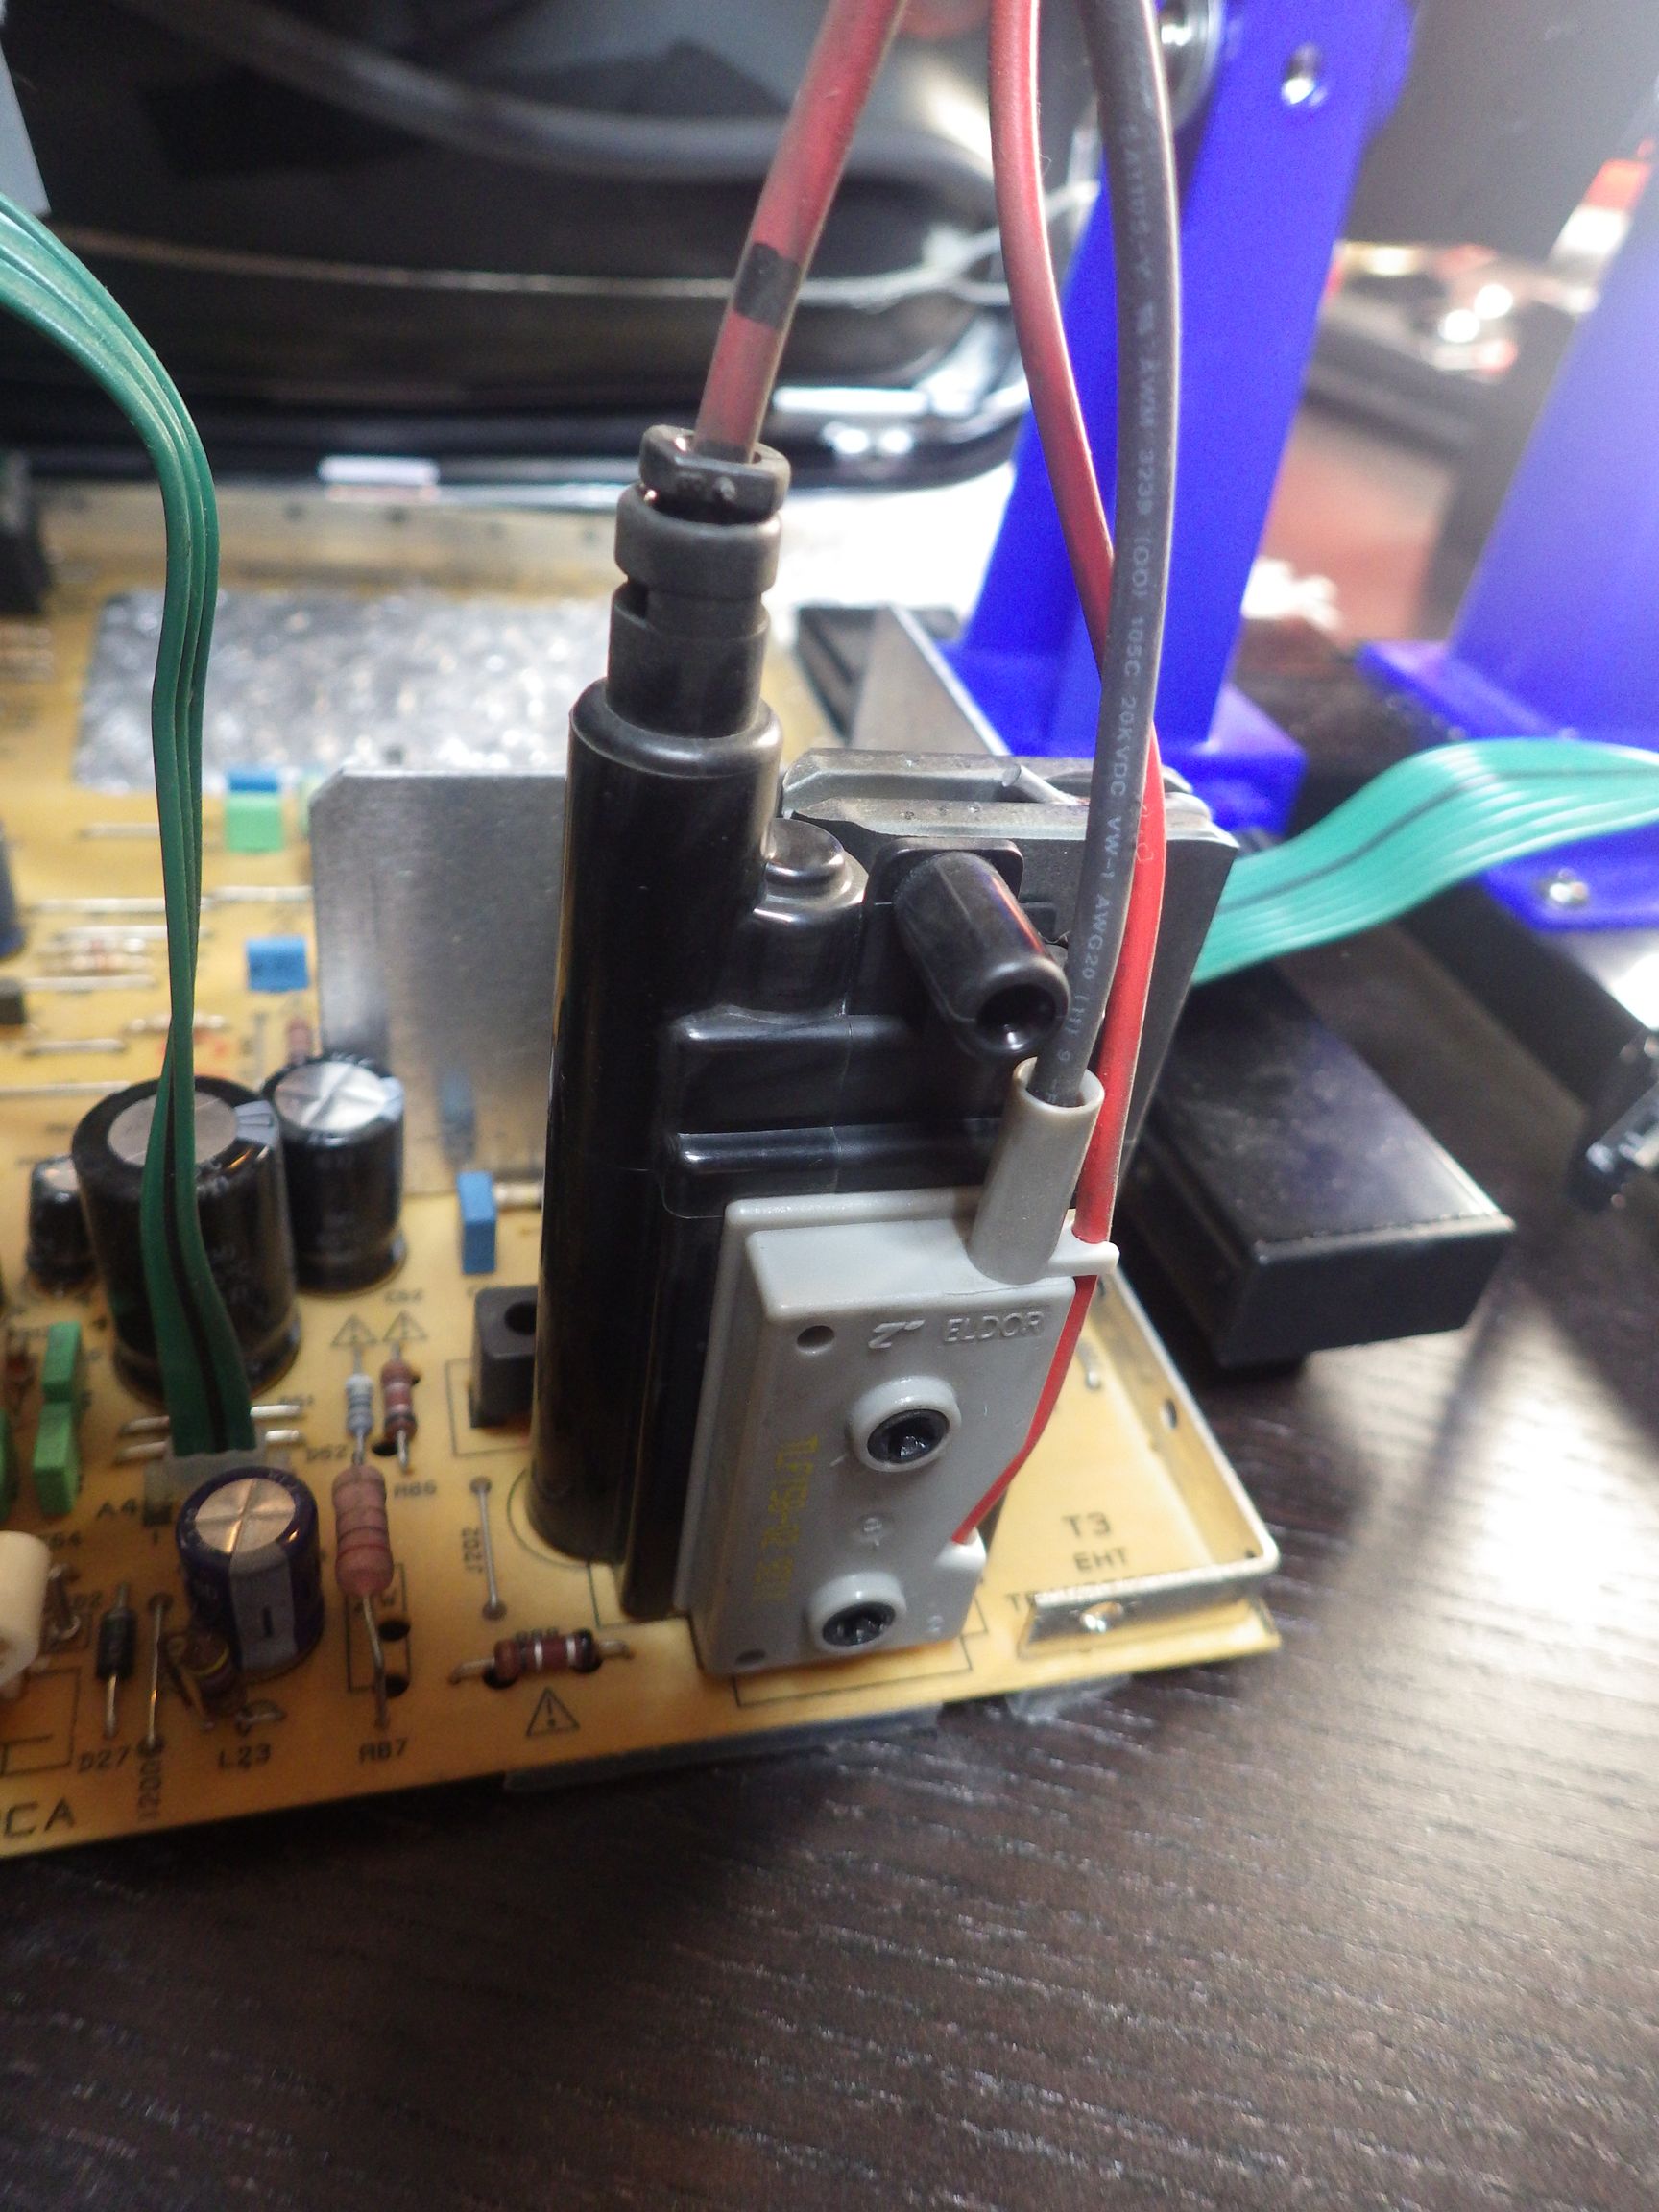

There are number of Philips chips on the board, including this SAA5563, apparently a "Enhanced TV Microcontrollers With On-screen Display Osd".
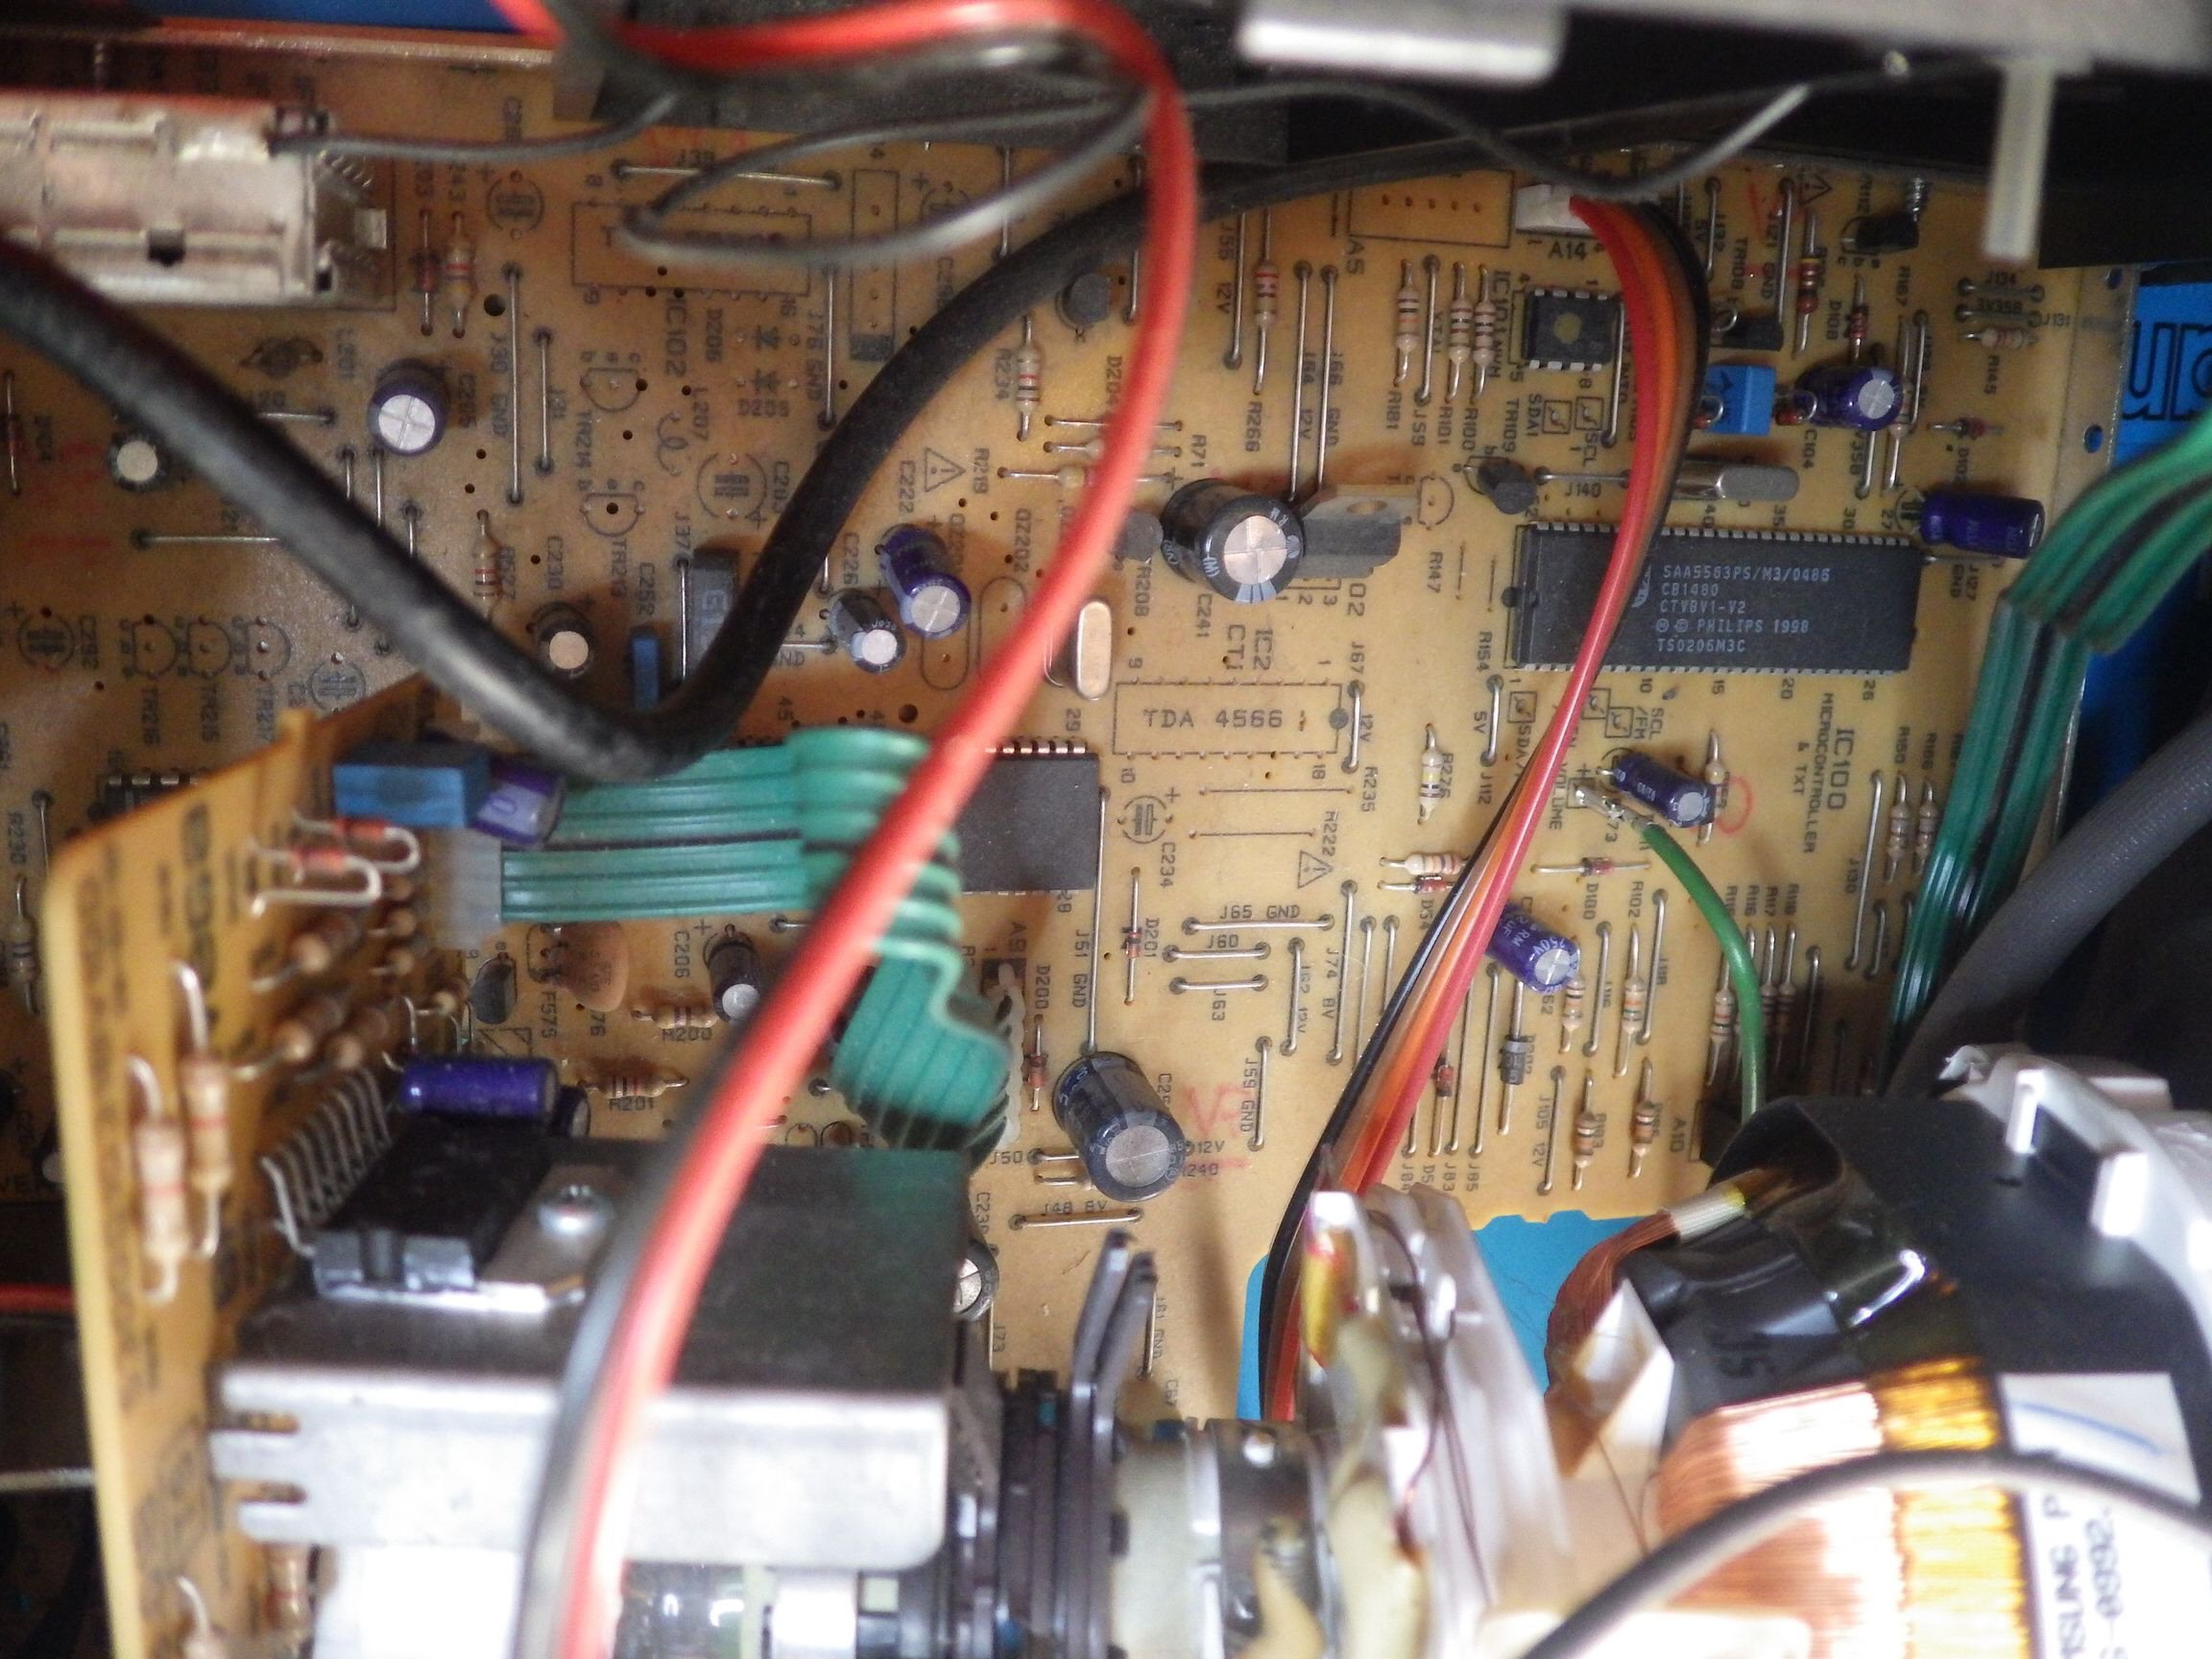


And on this last picture you can notice the large hole in the main board... that's where the PCB for the tube electronic control comes from :D
The actual issue
When dismantling the TV, we found a number of problems:There was some damage on the PCB, but apparently not important enough to cause any issue

2 of the 6 screws that attaches the main board to the frame are shorter than the four other, on purpose, because there are two elements on the board that are in the direct path of the screw, one is a transistor, one is the TV tuner. As it happens, one of the long screws was used to push the transistor, which probably twisted when moving the case.

The front of the main board was bent, probably because the metal rail around it was twisted as well. Also the metal shield plate on the bottom is also twisted, and was almost in contact with the mainboard components, enough that moving things around would make them touch, and in this case we were lucky, reset the TV instead of burning something.

Additional pictures
I'm just finishing with a bunch of photos that shows the theater of operations :D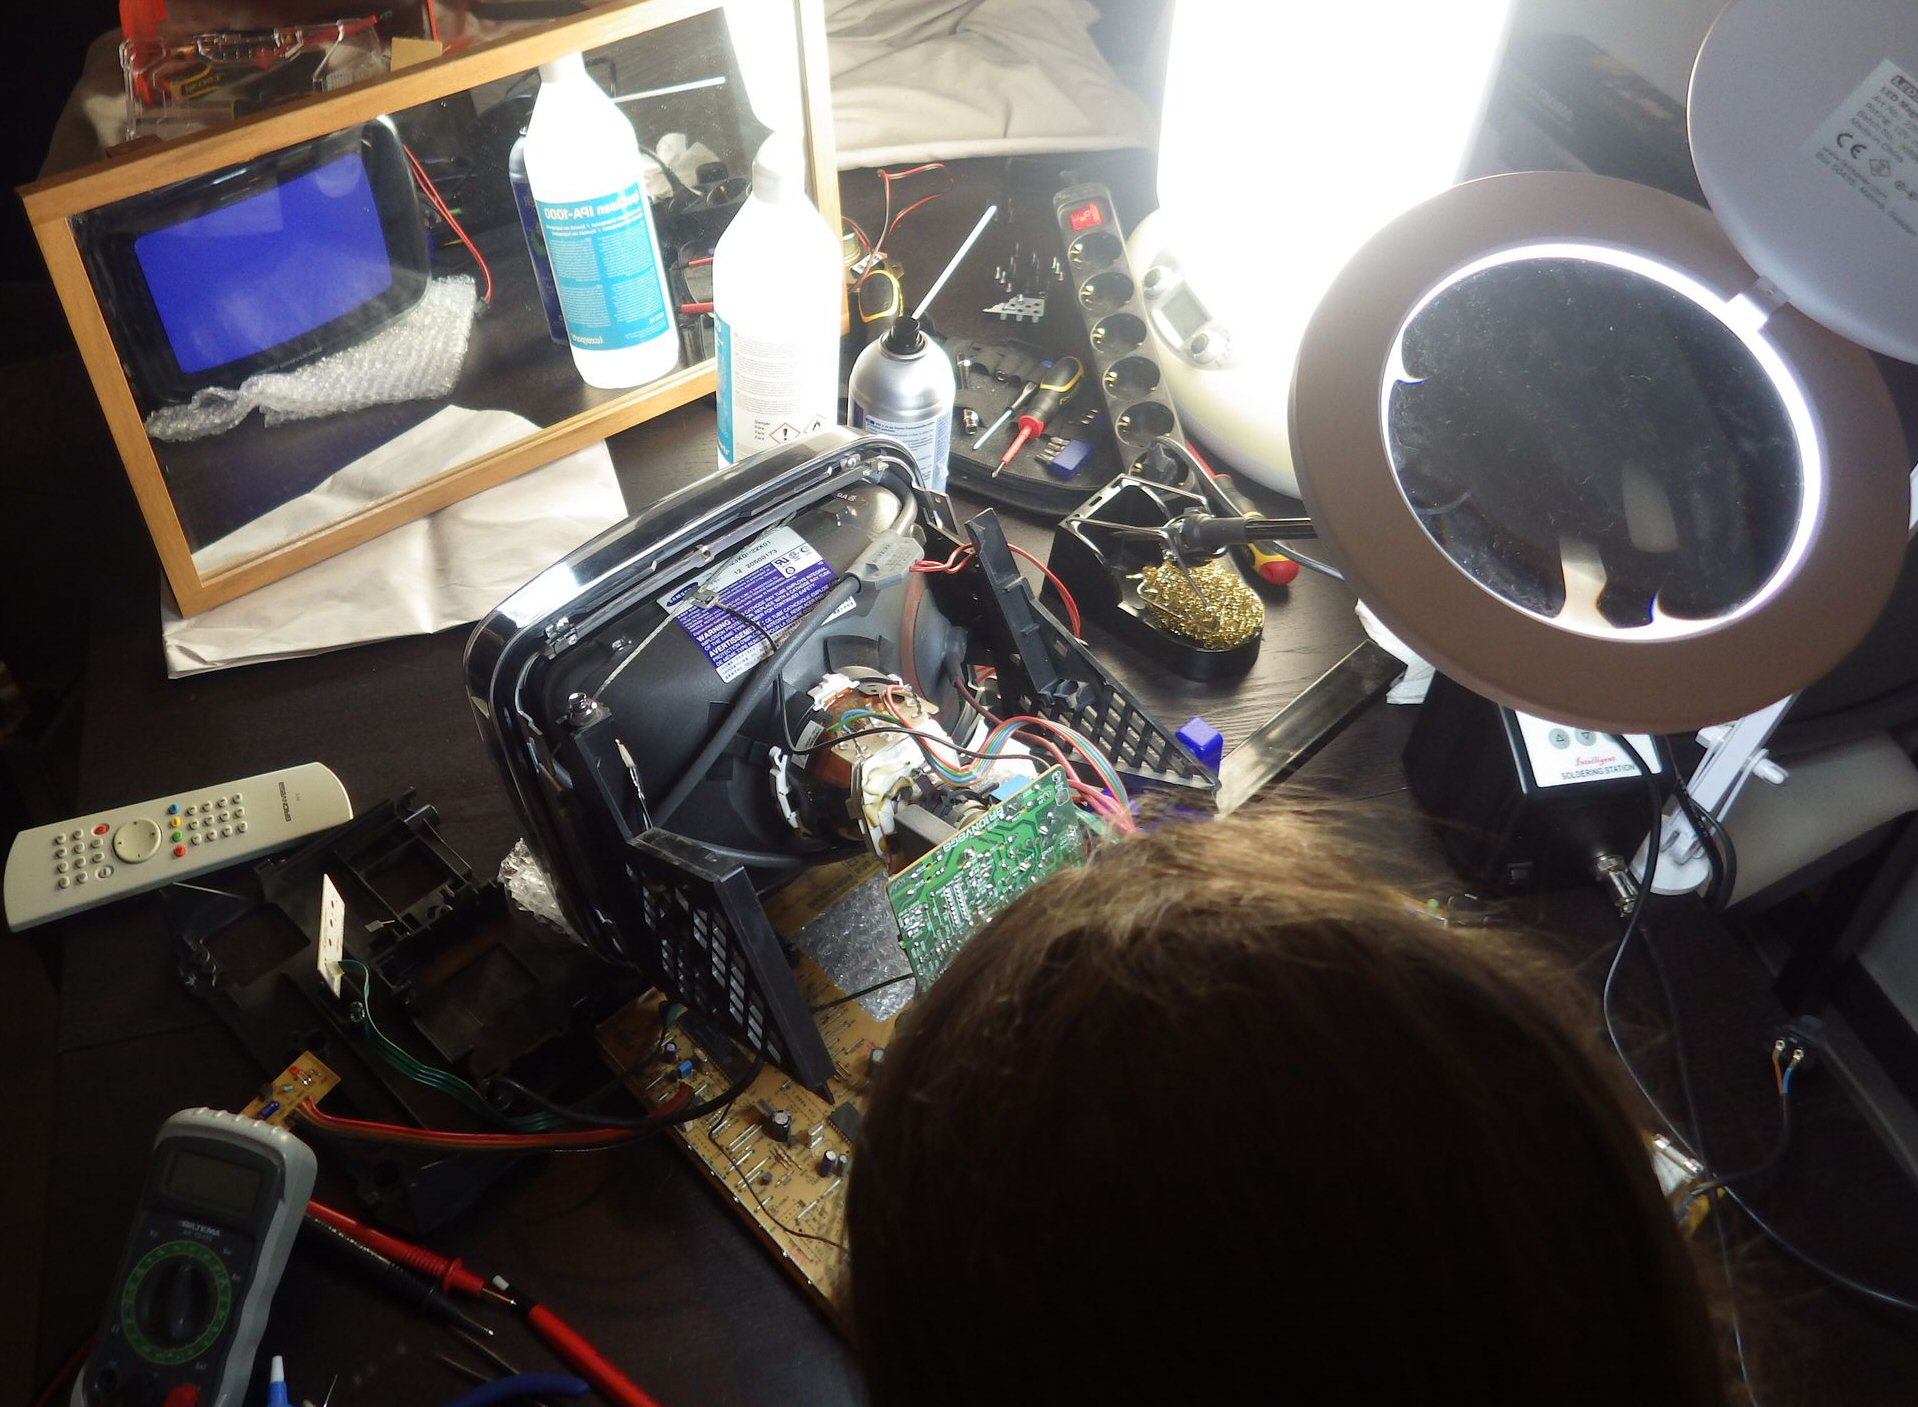

And a last one, showing that the patient survived the operation.
