 Noise reduction
Even if I'm doing most of my development on emulators, it's important for me to test everything on the real hardware!
Unfortunately the hardware in question is old and prone to failures, so it's time to get it ready and fix the issues.
The Mega STe
Not everybody will agree, but for me the Mega STe is by far the best machine built by the Atari Corp.It's not as fast as a TT, it does not have a DSP and TrueColor pictures as the Falcon 030, but for me it represents the right spot on the scale:
- It's extremely compatible with all the normal Atari STe software (games and demos)
- It's in practice twice as fast as a standard ST for all operations involving the normal operations (file manipulation, compiling, drawing, ...)
- It's extensible (can have both a hard drive and a graphic card inside the case)
- It's more space efficient (you can put the monitor on top of the case)
If you are wondering about what I mean by noisy, just watch this video:
Fortunately, the year is 2015, and we can use modern parts to fix this old problem!
Removal of the old fan
To access the fan, you need to remove the top part of the case.First you need to remove the hard drive compartment (one flat screw at the bottom), and carefully disconnect the molex power plug and flat cables.
Then you just unscrew the rest of the screws that maintain the main case (these are large Phillips ones), and pull over the top carefully to avoid ripping out the floppy drive connectors.
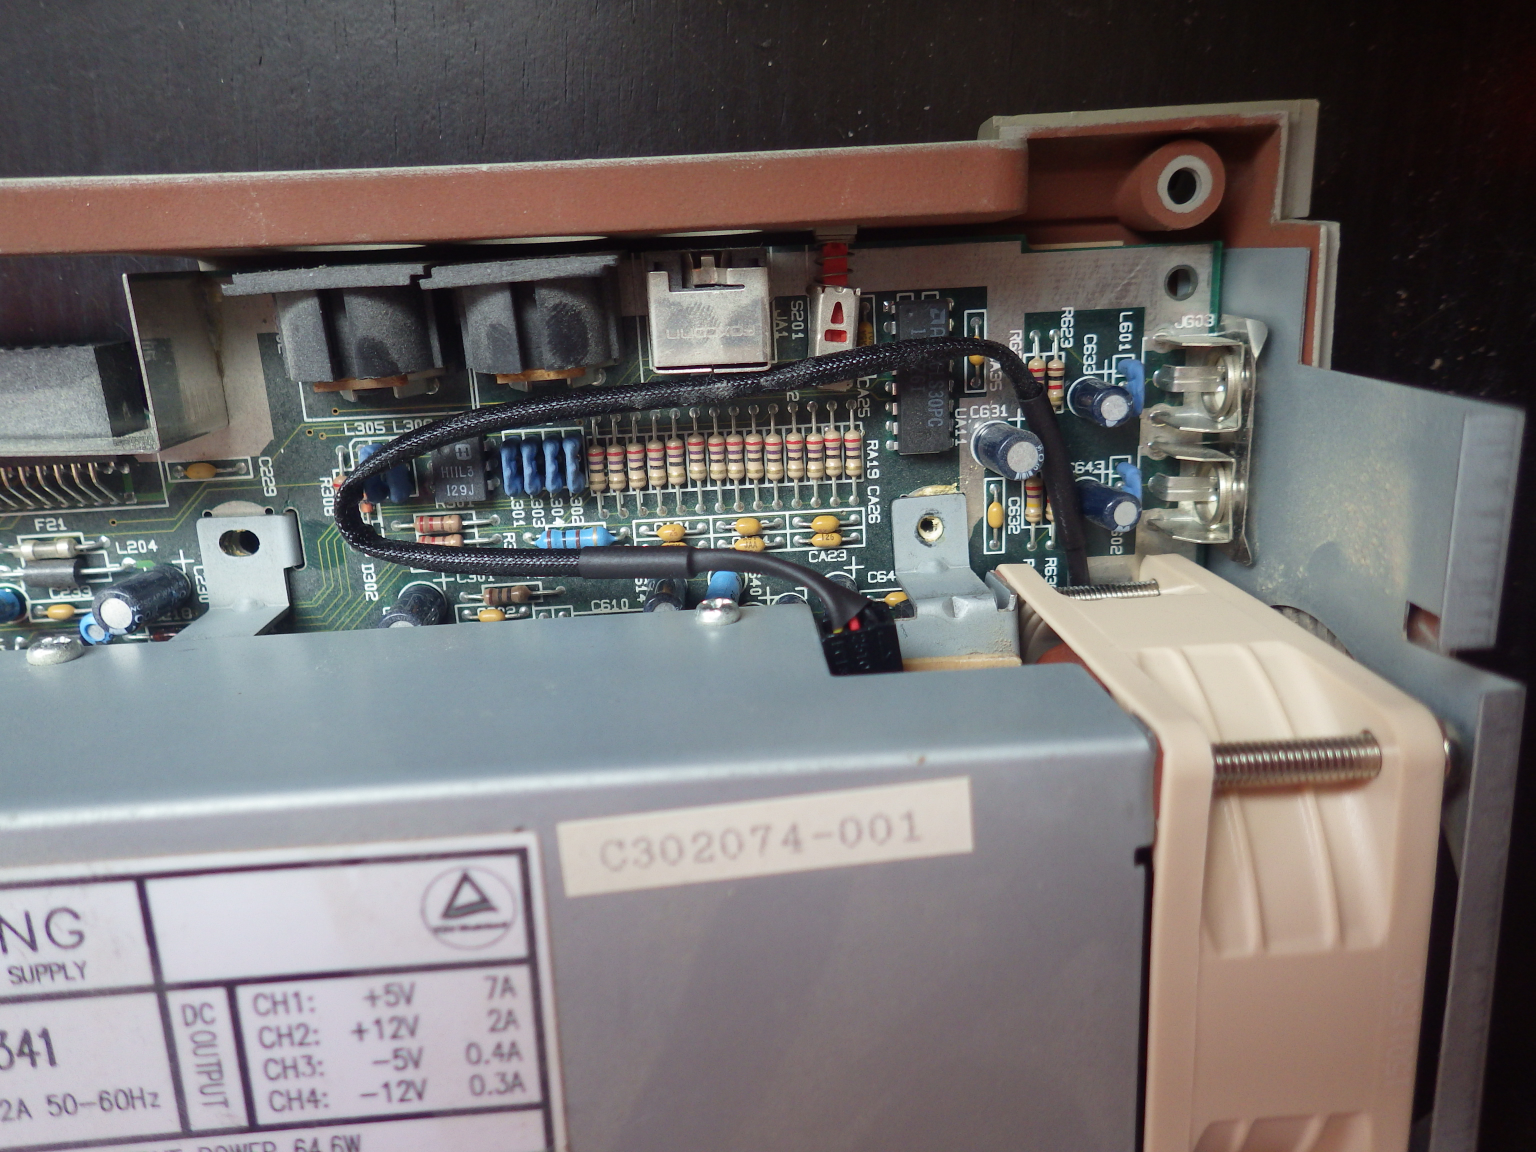
At this point you should see the following1:

On the top left is the power-supply unit, the black part in the corner is the 60mm fan we are going to replace.
Normally the wires are long enough to make it possible to do the entire operation without having to unplug anything, so just unscrew the PSU (there are four screws to attach it to the motherboard), then just drag it toward you and let it lay on it's back on the top of the VME-Card connector:

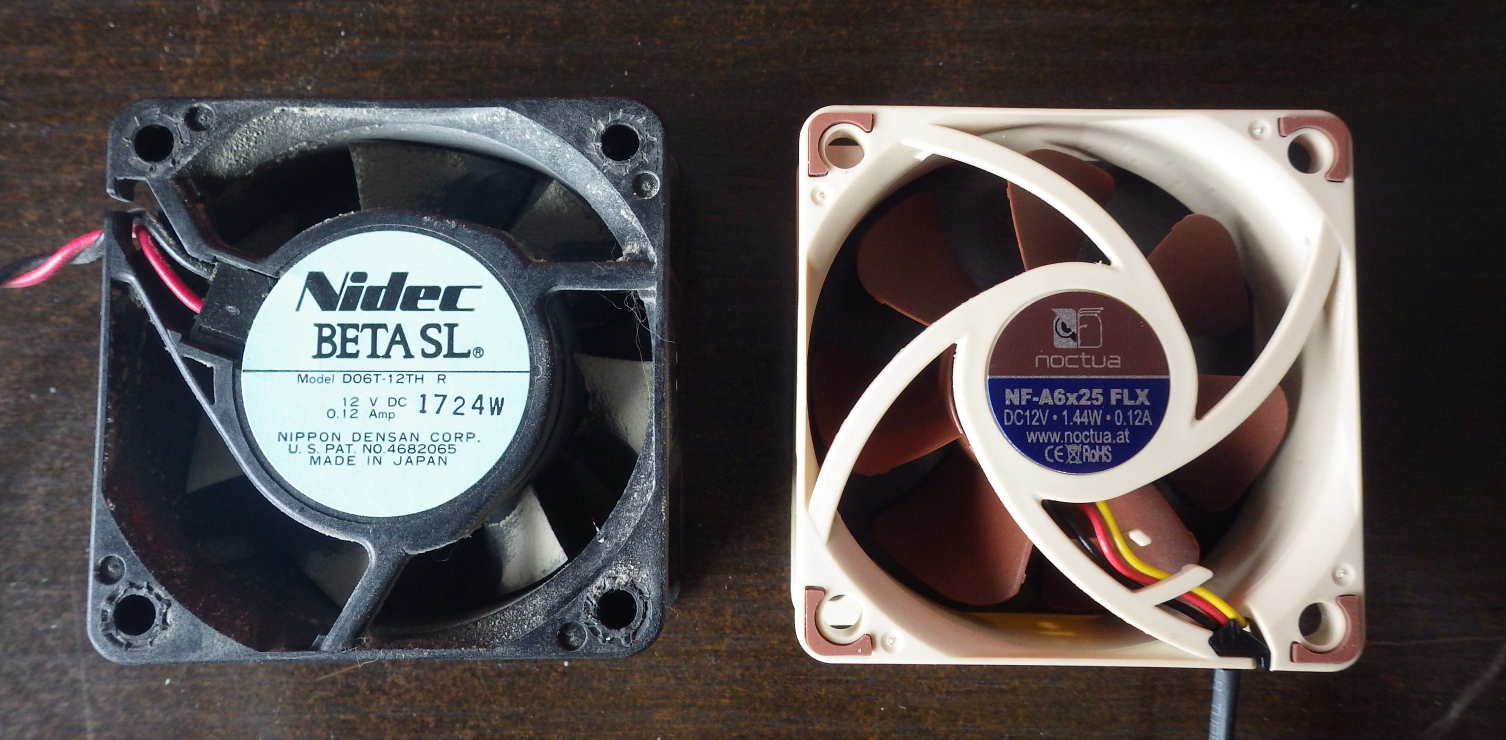
As you can see the fan is a very standard 60mm, 12volt fan2. All you need is to remove the four long screws and disconnect the plug.

On my machine there was glue on the plug, so you may have to scratch it away using a sharp knife.
Make sure you do not twist the pins or break the solders!
Noctua FTW
I've been building and repairing computers for quite a while, and if I had to select one common occurrence in all issues, it is that fans tend to fail: Fans on power supplies, fans on cpus, additional cooling fans, fans on the north-bridge, fans on graphic cards.They start to collect dust, the slow down to the point of being inefficient, or the ball bearings fail.
The result? Noisy machines, machines that overheat, or machines that make so much noise that you don't even want to use them anymore.
The bottom line: Don't buy cheap fans, use quality ones, and yes the price difference generally matters.
I first discovered the Noctua brand when I was looking for a quality air cooler for my Intel Core i7 2600k; the Noctua NH-D14 kept coming in the recommendations, and even years later you can still see it with a five star ratting on newegg from more than a thousand reviews3.
More than three years later it's still going strong, and is still as silent as it was on the first day.
That's the reason why I decided to go again with Noctua, and bought a NF-A6x25 FLX model, a nifty small replacement fan with high quality bearings, vibration dampers, and two speed reduction cables.
Here is a side by side comparison of the old and new fans:

And if you are wondering about the actual sound difference, here is a small video for you:
The difference is obvious, isn't it?
Installing the new fan
Well, it should come without surprise: The installation of the new fan is exactly the reverse of the removal of the old one.The only difference is that the original connector had two pins (red and black) while the new one has three (yellow, red and black): Just make sure you connect the new fan on the red and black pins, leaving the yellow one unconnected.

The new wire is longer, and slightly stiffer than the old one, but normally this should not be a problem.
Just put back all the screws, switch on the machine, and enjoy a much more silent machine.
Let's push it
At this point the machine was much more silent, and it did not have these annoying rattling noise, but it was still possible to know that it was powered.For the next step we will have to actually modify the appearance of the machine.
If you look on the back, you will see that the air vents are actually very narrow slits, definitely not optimal for the air flow.
My suggestion is to do these to things:
- Install one of the two speed reduction cables that come with the fan to reduce the speed from 3000 to either 2400rpm (NA-RC10) to 1600rpm (NA-RC12)4
- Cut away the existing plastic area to improve the air flow5

And here is the final result with both the speed reduction wire and the hole:
I'm planning to clean up the work and add a nice metal grid to make it final, but the result is achieved: A virtually silent Mega STe!
1. This is the ideal moment to use a can of compressed air to cleanup years of dust accumulating all over the place↩
2. This is a Nidec BETA SL FAN D06T-12TH R, apparently a good brand - well, it still works after 20 years↩
3. And also five stars from 457 customer reviews on Amazon. It's *that* good - if it fits in your case↩
4. I choose the NA-RC12↩
5. See more information about Effects of Grill Patterns on Fan Performance/Noise↩